GGG' afternoon!
and Merry Christmas!
this video gave me huge enlightenment and deep relaxation to solve part of my past wonderings.
and again,
pour a tremendous amount of aspiration wanting to learn more.
as he is a blender guy, he was talking the photorealism in 3d software
but this is more than this.
it's about the colour dynamics relations with light.
so the conclusion was simple.
blender use sRGB, which shouldn't be used for final rendering.
because the colour dynamics range doesn't match to real life that is captured by the camera.
so what we need to do is change the sRGB mode by adopting an extension.
which is, a "flimic blender".

_
I thought this video was worthy enough to capture the images
and bring the script
so underneath I haven't done any further studies yet.
so these are just simply the video content itself, just the part that I wanted to capture to recall.
the script was automatically generated by youtube, so there are bunches of wrong typed text.
and the grammar error, no colons and wrong-typed context.
so I better recommend you just watch them by yourself.
it would save you time.
Have you ever noticed how render can have almost everything going for it like really good modelling really good
materials really good lighting and yet it still looks distinctly like a render
you're not sure what it is but something about it just feels fake now most of the
time this could be anything but this video is going to focus on one mistake in particular
one that 99.99 of you watching this don't even realize is happening
and if you're not interested in photo realism right now you should still watch this because this mistake affects
everyone when you correct it you'll be able to have a light that feels like real lighting you'll get more freedom and
you'll be able to create scenes that just feel more believable but first, we need to go back to our
original problem why do some renders despite having everything else right still feel fake
well to talk about photorealism you need to talk about cameras and in this case specifically how
cameras see light because it may surprise you to learn that the way blender sees light and the
way cameras see light are quite different

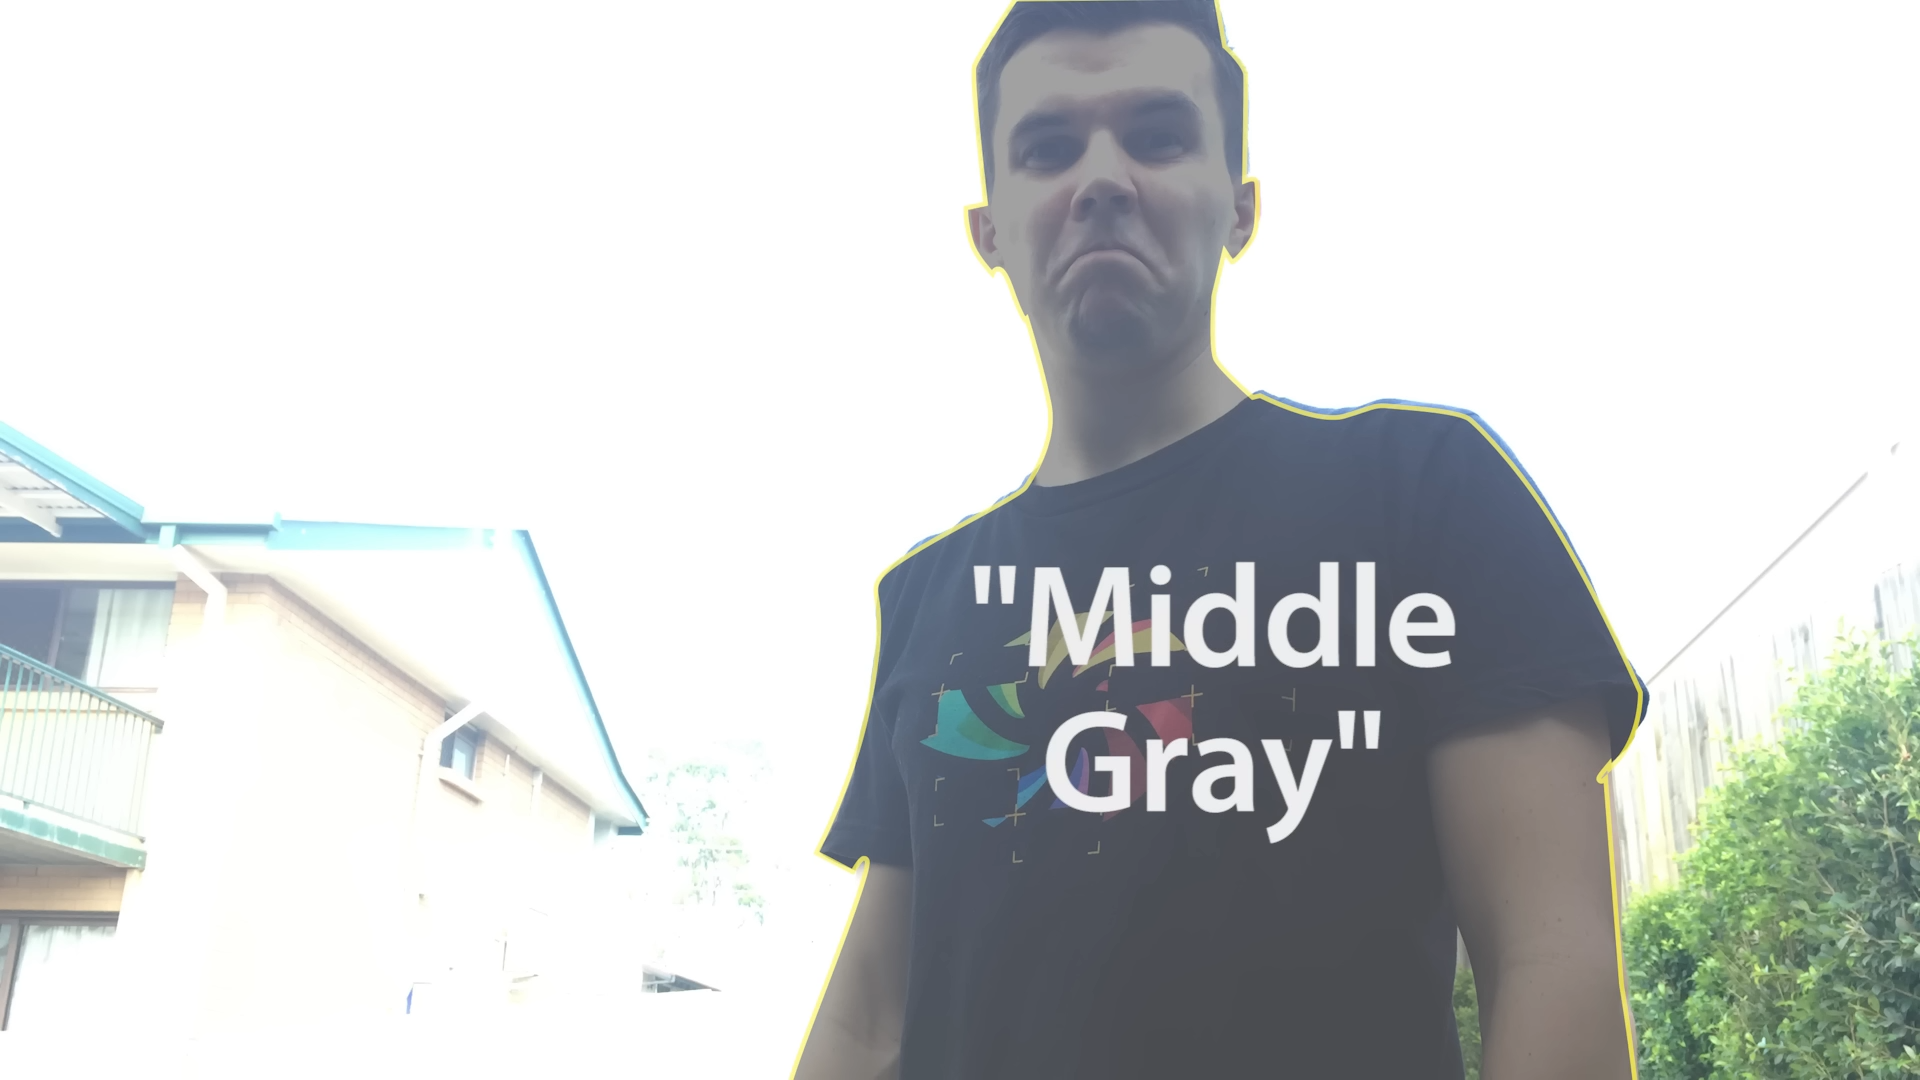
so you know how sometimes when you take
a photo of someone against a background their face looks really dark so then you select their body and the
the background becomes really bright this is due to the exposure point if you
have something dark and something bright in the same photo the camera can only show one of them in exposure
it does this by looking at that point and then adjusting the settings of the camera namely the aperture shutter speed
and iso until that point sits at the middle gray now the camera will show things that are
brighter and darker than middle grey but only to a certain point
so for example
1:47
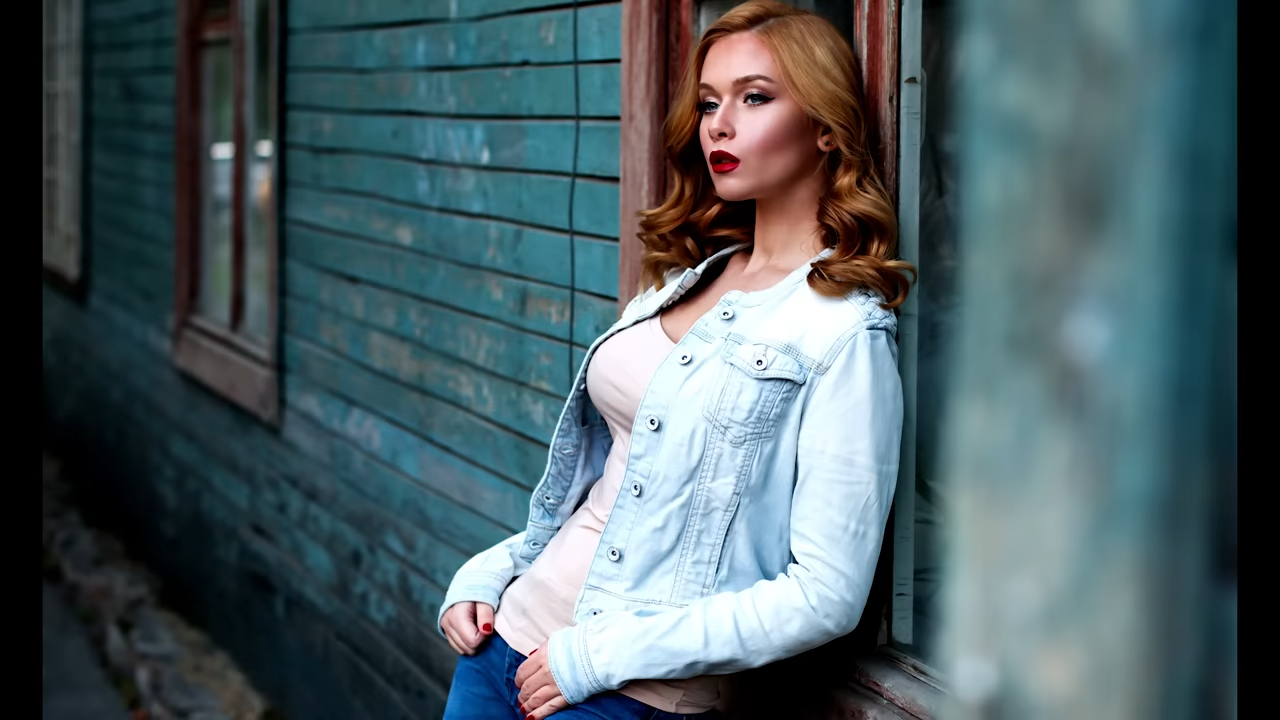
you can see in this photo hello that the dark detail in the background is lost and the bright detail in the
1:54
jacket is lost this is sometimes called clipping and it's really bad.


2:00
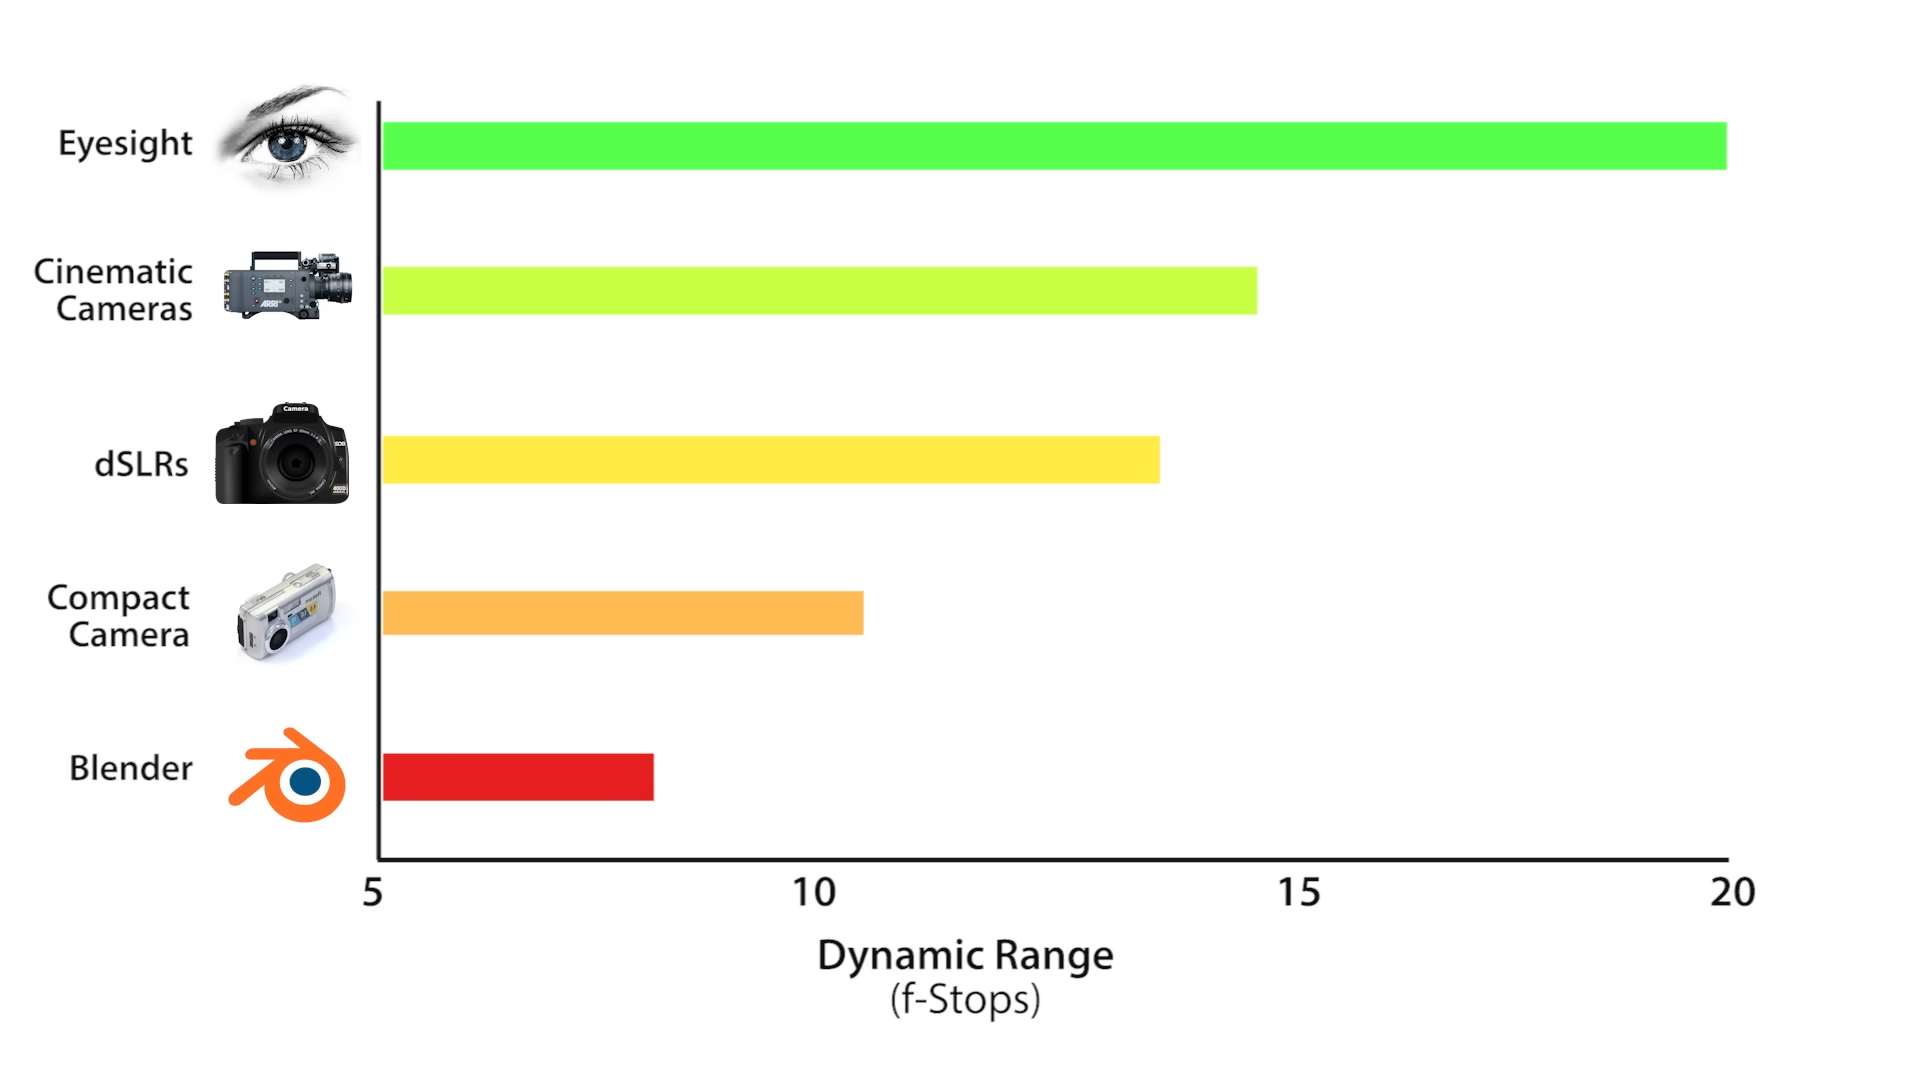
the amount of information that the camera can see on either side of the middle grey value is called the dynamic
2:07
range of the camera the more dynamic range the better the camera and the better the final image

2:13
a cheap compact camera can see at about 10 or 11 f-stops which is the unit
2:19
that's used to measure the dynamic range dslrs are a little bit better seeing from around 10 to 14 stops and the ahri
2:28
alexa which is the camera that most big budget movies are now shot on sees at
2:33
14.5 stops but the best of all is our eyesight
2:38
seeing at an estimated 15 to 20 stops of dynamic range
2:44
so what range does blender have unfortunately a pitiful eight stops
2:53
that means that by default you're rendering at a far worse range than even a crappy compact camera
2:59
and to make things worse blender also has an arbitrarily high middle gray

3:05
exposure point meaning you have less room for brightness now together these create some pretty
3:12
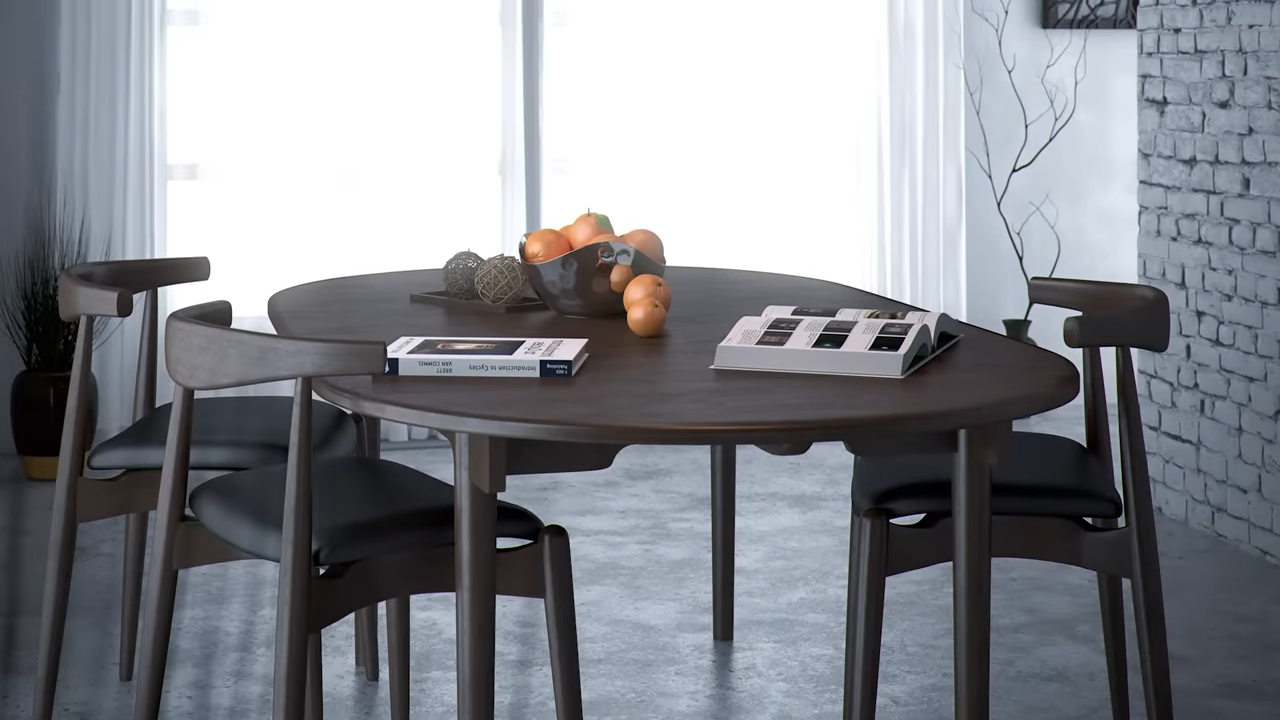
big problems for your scene so as an example i'm just going to light this scene here and i'm going to show
3:17
you why this compressed dynamic range yeah causes problems for us okay so i've got
3:24
a pretty basic scene here got a dining room got some chairs and i want to have some sunlight streaming in through this
3:30
window over there okay so you can see i've got a sun lamp over here and what i might do in this situation is
3:37
go into rendered view mode and what i'm going to do is just increase the sun lamp until it looks
3:44
bright enough because you can see by default you know one is pretty low so i'll just increase this
3:49
until it looks about right now i don't want to go too bright because obviously you don't want it to look like there's a
3:54
big supernova outside the window or whatever so i'm just going to increase it as far as i can until i start to lose
4:00
detail
4:36
so as artists what would we do well in this situation what i've done in the past is i've done some cheating okay so
4:43
i go back in here and i go okay well if there's not enough light coming from the sun what i'll do is i'll increase the amount of uh of fill light like the sky
4:51
lighting so i might increase this to i don't know 50 like really really exaggerate just try and pump in as much
4:57
light as i can into the rest of the room or i might actually
5:02
exaggerate the bounce lighting off the wall there so i might you know select that table there and i'll add in a lamp
5:09
um by the way this is the wrong way okay i'm showing you now just just as a reminder this is an
5:16
example of some of the problems that uh this this reduced dynamic range creates
5:21
okay so i might you know add in a lamp like this now this this is fairly common okay and that would you know bounce some
5:27
light off there and you know i would feel like as an artist yeah i fixed it you know okay but when you think about it
5:34
this workflow makes absolutely no sense okay from a physical standpoint why
5:40
would we need to add fake hidden lighting coming off the wall or you know really
5:47
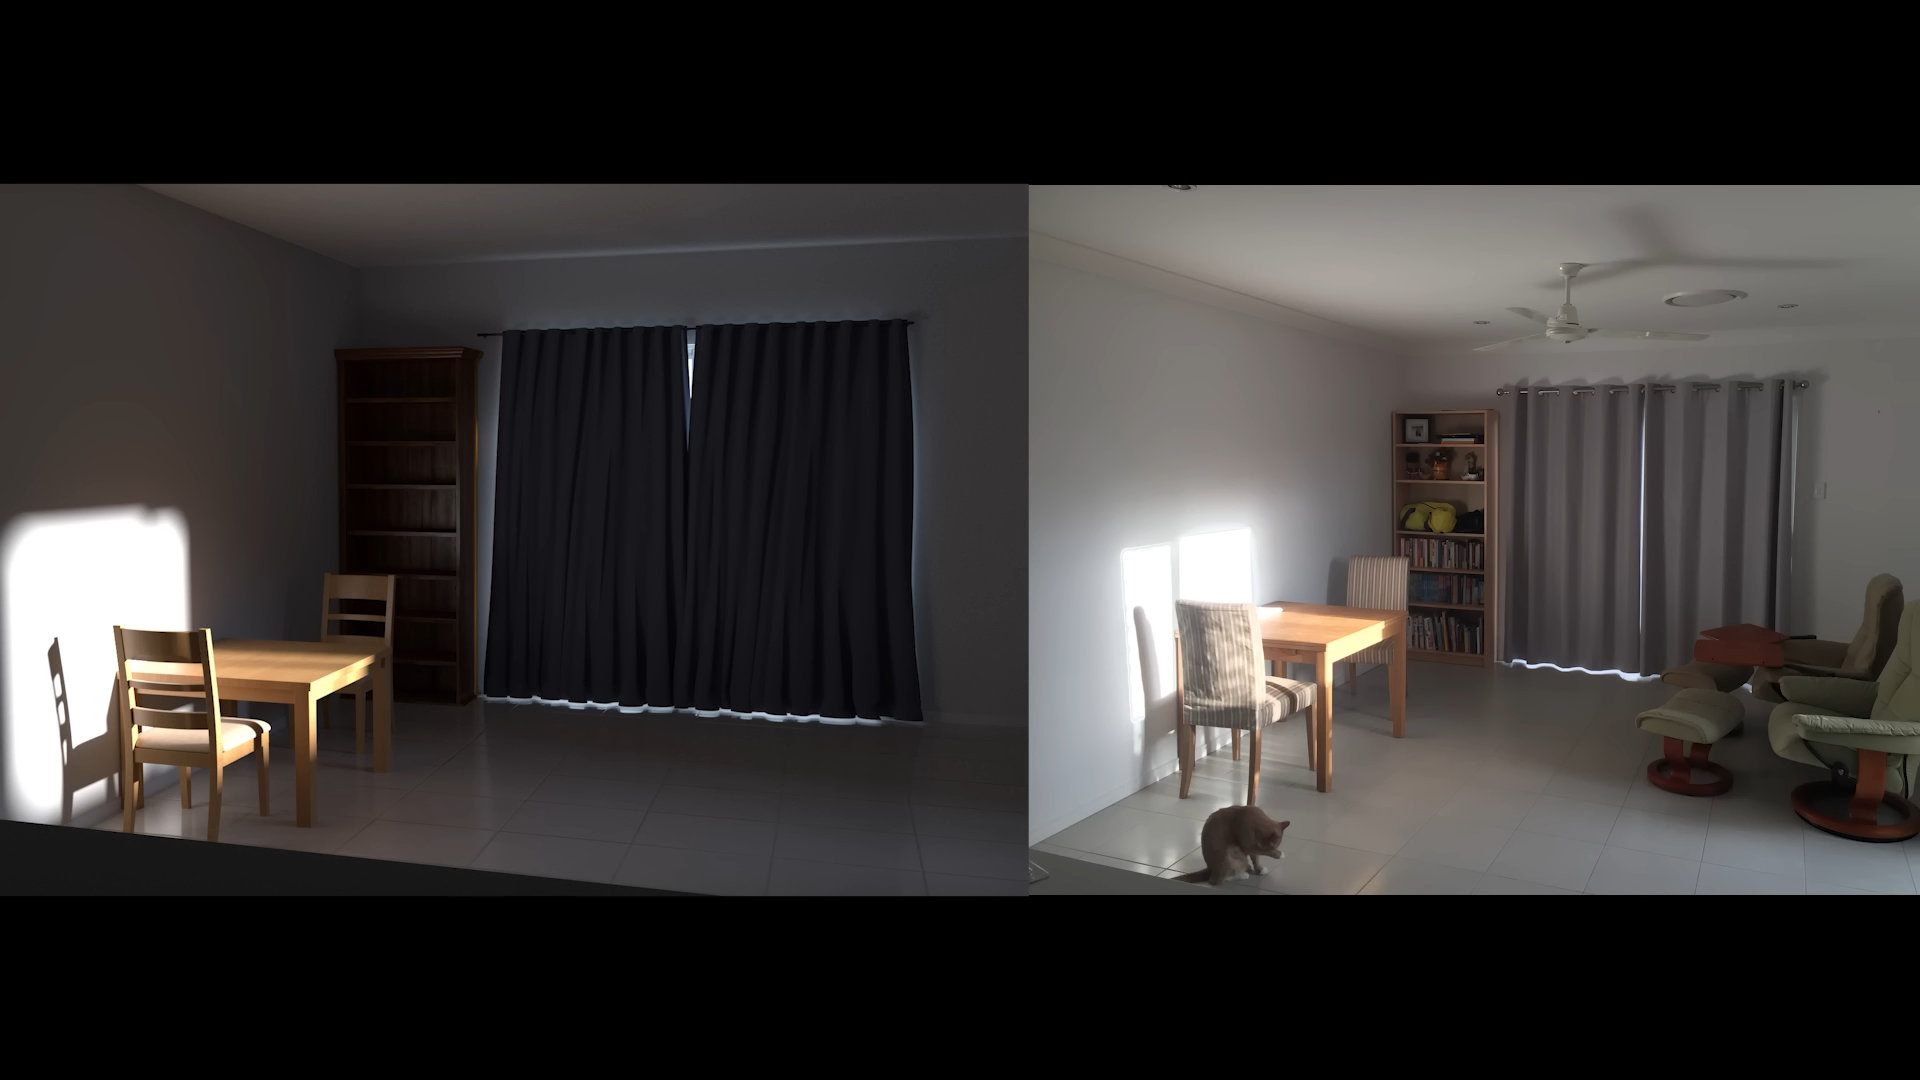
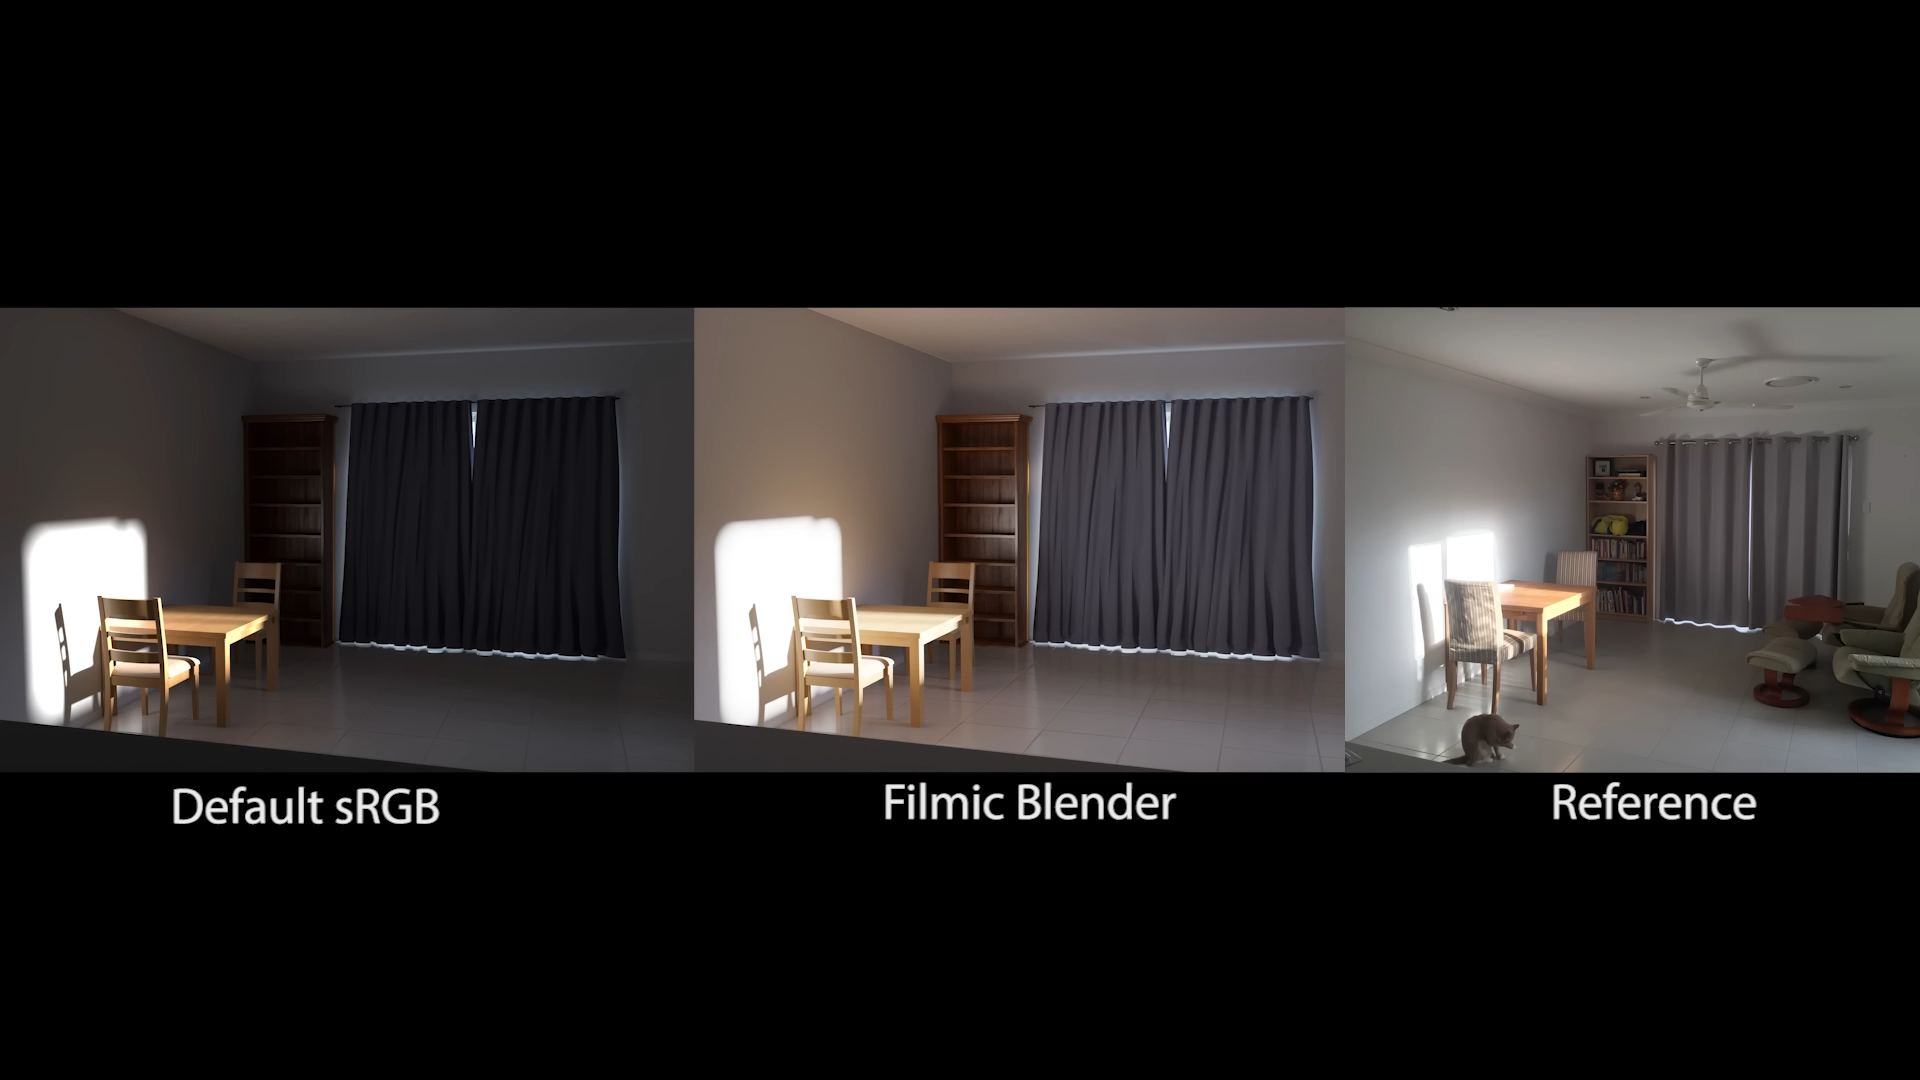
exaggerated sky lighting to this scene because for proof here is the reference
5:53
okay so this is actually my dining room and i took this photo with my iphone now you can see that in the reference when
5:59
we compare it to our render the reference looks far brighter okay the room is filled with lighting there is
6:05
enough light coming off that sun there to light up the room i obviously don't have any hidden lamps going on under the
6:10
table like i did in my render and yet there is adequate lighting almost an
6:16
abundance of lighting it's crazy bright in there just from that bounce lighting of the sun
6:21
so why didn't it work in blender well it all falls back to that reduced dynamic
6:27
range that crushed compressed dynamic range because what's actually happening is when the when we set the sun lamp
6:33
value for our sun so let me just grab it here again so i decided that it was around about oh actually i should
6:38
probably delete that other stuff i'll set that back to what it was before so back back to the original problem here
6:45
so i when i set the sunland value here i set it around about 20 because that's what looked right and when i say right i
6:52
mean you know it it felt like the value of the sun so i felt like 20 was about
6:58
the brightness of the sun but actually the real sun should be much
7:03
much brighter than what we're used to doing in blender like most of us don't go really above 20 or anything like that
7:08
when we're lighting a scene but the real sun is magnitude brighter than what we're setting it in blender the only reason
7:15
that it looks so bright in this situation is because of that crushed dynamic range
7:21
so if we could fix the dynamic range if we could extend the dynamic range to be bigger
7:28
than this then we can increase the sun lamp to be far far brighter which is what it should be
7:33
and that would then light up the rest of the scene naturally without having to do any cheating whatsoever
7:40
so i'm hoping that you can understand that this is a really simple scene very basic environment and these are the
7:46
problems that we'd run into with just this simple scene with a more complex
you know huge you know production ready
7:53
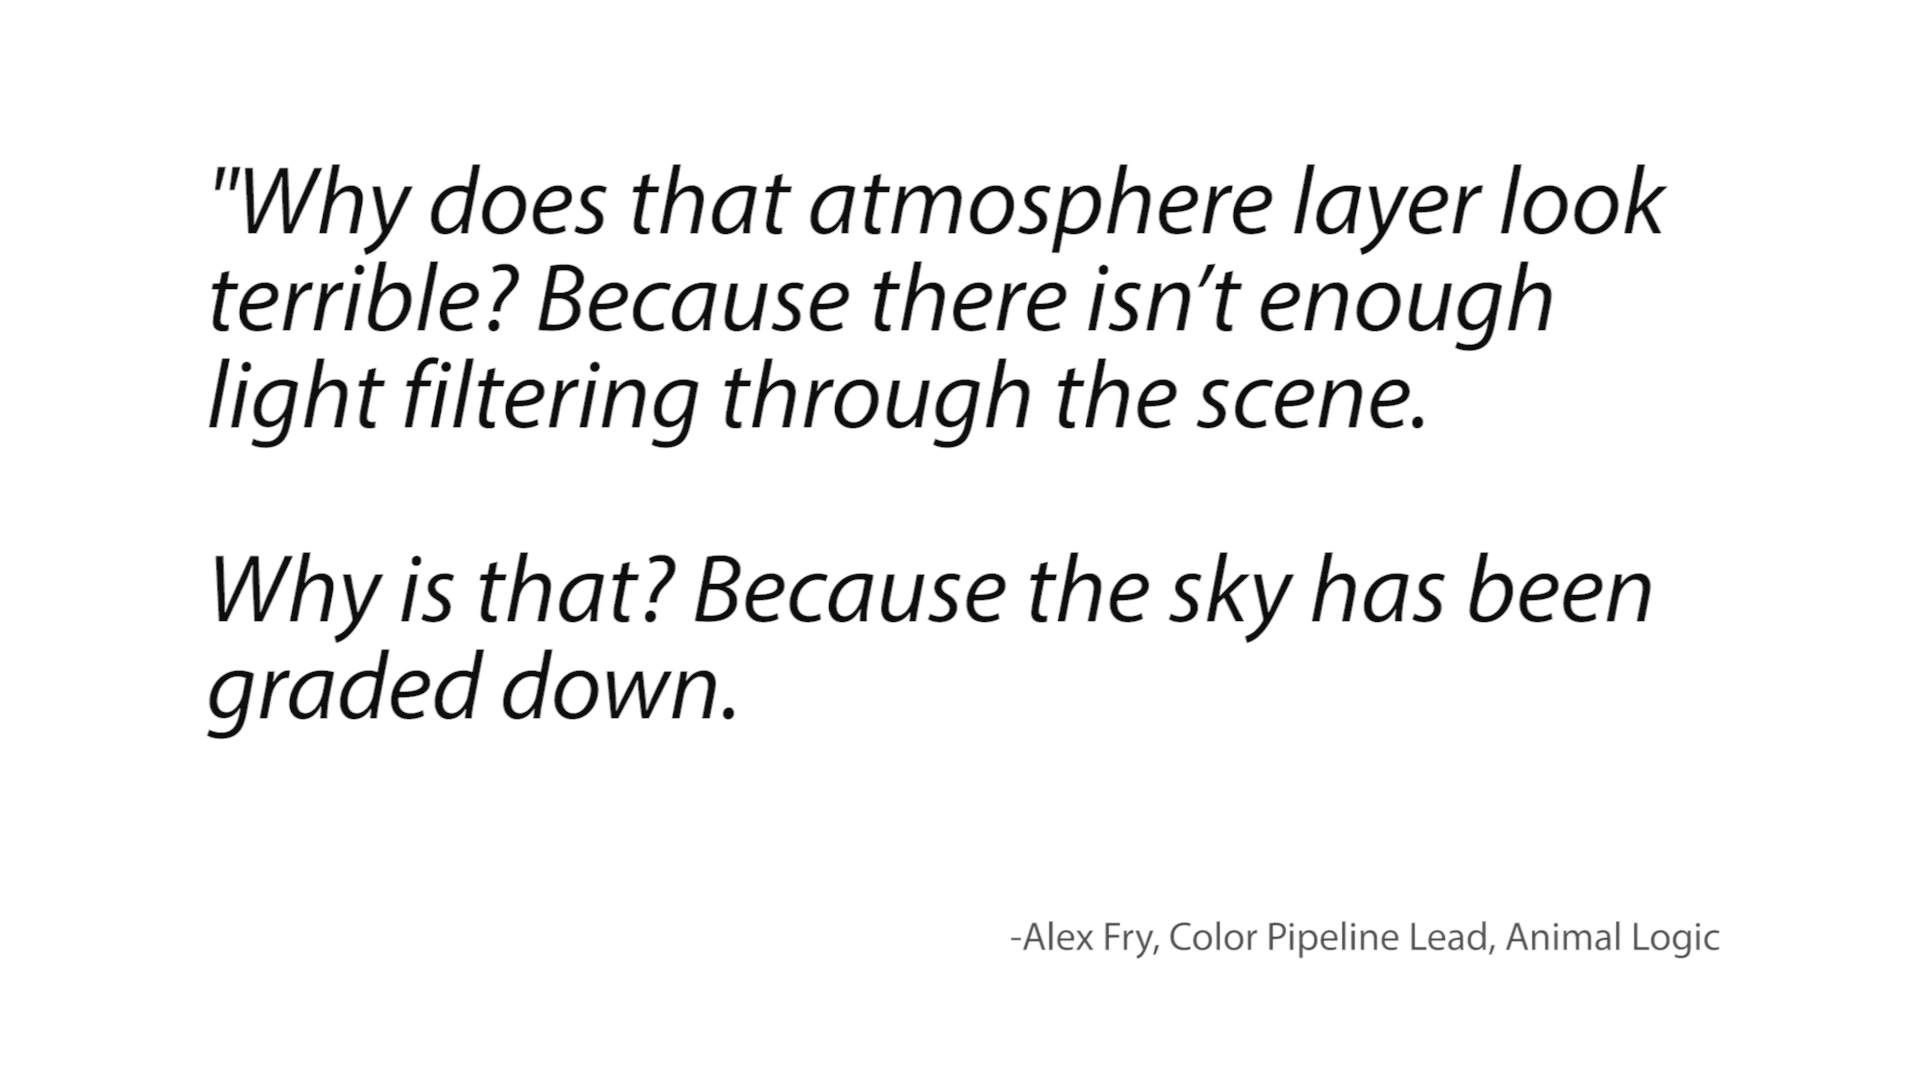
type of scene the problems just build up and build up and build up or to use a quote by alex frye why does
8:00
that atmosphere layer look terrible because there isn't enough light filtering through the scene and why is
8:05
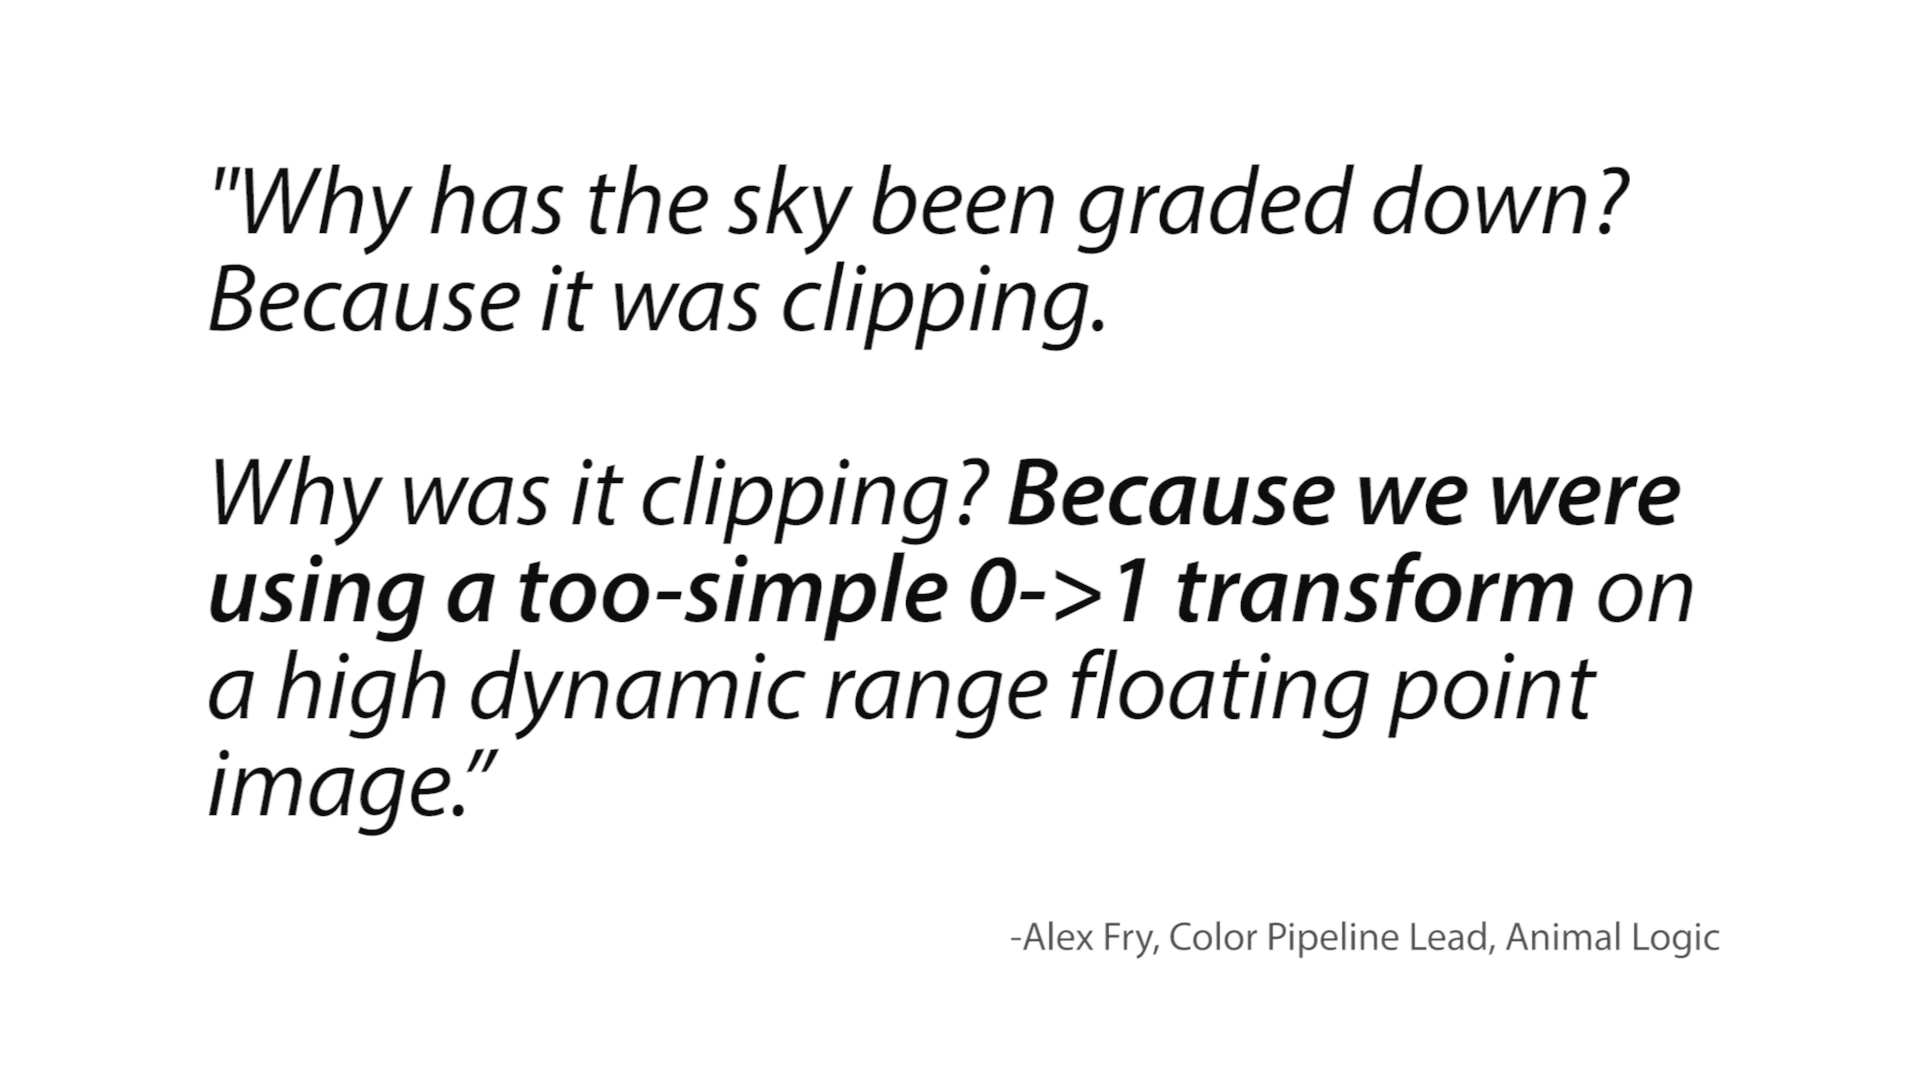
that because the sky has been graded down why is the sky been graded down because
8:11
it was clipping why was it clipping because we were using a too simple zero to one transform
8:17
on a high dynamic range floating point image don't worry we'll get to that lights don't bounce enough
things don't

8:24
flare enough and pings don't pop enough so what the hell blender
8:29
now you might think that the solution would be to jump ship to another renderer but actually many of those
8:34
suffer from the exact same problem blend is not alone here the solution is to actually change the
8:41
color management configuration that blender uses to render now i know this sounds odd so let me
8:47
explain briefly what color management has to do with dynamic range so when you take a photo the camera is
8:53
storing that image as ones and zeros and before your display can actually read it it has to be converted and this is where
9:00
a color transform is used now maybe you've heard of them before they have scary names like rec 709
9:08
log and 3dl etc different ones are used depending on the camera and the intended display
9:15
well 3d renderers are no different before you can see the render a color transform is used to convert the ones
9:22
and zeros from your virtual camera into colors that your monitor can actually see
9:27
and this brings us finally to the root cause of the problem blender is using the srgb color
9:35
transform and this is bad news because srgb was originally designed to
9:41
approximate the response of a crt monitor this thing is vintage

9:47
it was never designed for rendering nor should it ever be used for rendering
9:53
so if you're thinking like i was when i first heard this how on earth could blender have been
9:59
using the wrong color transform for all these years without anyone noticing well


10:04
the reason it's gotten by for so long is that color is actually extremely technical and there are actually very
10:11
few color experts in the world that understand it 100 so when srgb was chosen many years ago
10:18
it's likely that no one actually even knew that it was incorrect and years later even if someone did notice it's
10:25
difficult to convince the user base to change when one most users don't even see a problem and two they're used to
10:32
the way their lighting behaves with srgb in order for blender to change the user
10:37
base first needs to understand why it's broken and then and only then can a push
10:43
be made for it to be changed by default speaking of which if you want to help a
10:48
really simple thing you can do is actually press like on this video that'll help it show up in more people's
10:53
recommended youtube videos which will slowly educate more of the community so hopefully the solution i'm about to
10:59
propose can be made default sometime in the future now i want to repeat that regardless of
11:04
whether you're making cute cartoony images motion graphics or photorealistic images

srgb should not be used for
11:12
rendering it mangles your color data and creates problems that ripple through your scene
11:18
so what is the solution can we finally get to it the solution is to use a custom
11:26
color management configuration called filmic blender filmic blender was developed by troy
11:32
sabotka an industry professional who saw the problem in blender and wanted to do something about it so he created this
11:39
custom color system which emulates aces which is the industry standard color
11:44
space now in use by nearly every major hollywood film now remember dynamic range
11:50
well filmic blender allows you to go from 8 stops to 25 stops of dynamic
11:56
range when you start using filmic blender you'll notice that you don't get those harsh hot spots anymore the lighting
12:03
falloff feels smoother not only that but you can start using accurate light values increasing the bounce lighting
12:10
and getting natural looking scenes without needing to cheat and best of all it's free
12:17
troy could have charged 200 for this and i still would have paid for it but he
12:23
wants to change blender for the better so he's graciously giving it away for nothing
12:28
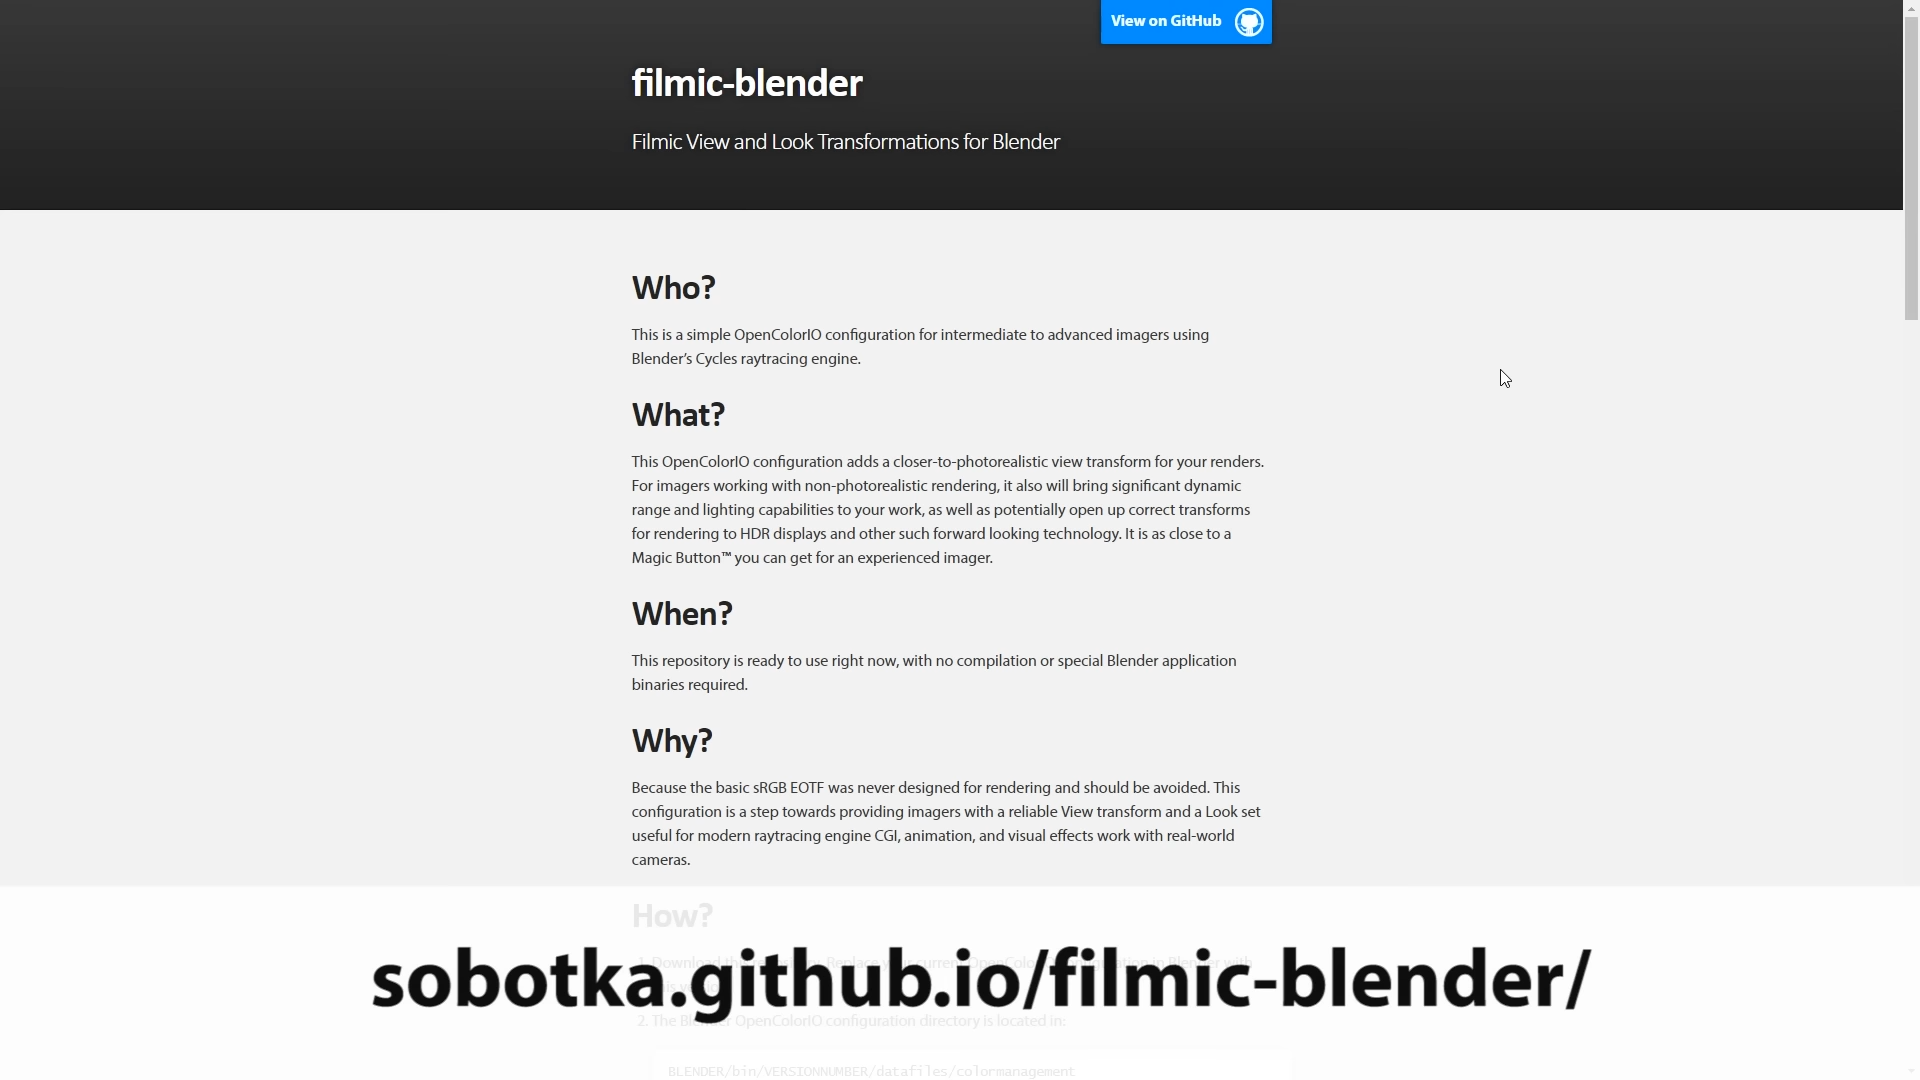
so to download filmic blender click the link in the youtube description which will take you through to this website
12:35
now there's a bit of information here how to install it how to use it etc to download it what you want to do is click
12:41
on view github and that'll take you through to the github interface which always confuses
12:48
me the way to download it is by clicking on the clone or download button and then
12:53
download zip okay it's very small download but once you've downloaded it you should see
12:59
when you unzip it unzip it to any random folder doesn't really matter but once you see it you should see inside you've
13:05
got a bunch of folders that look like this okay so just keep that there and what we're going to do is load up where
13:11
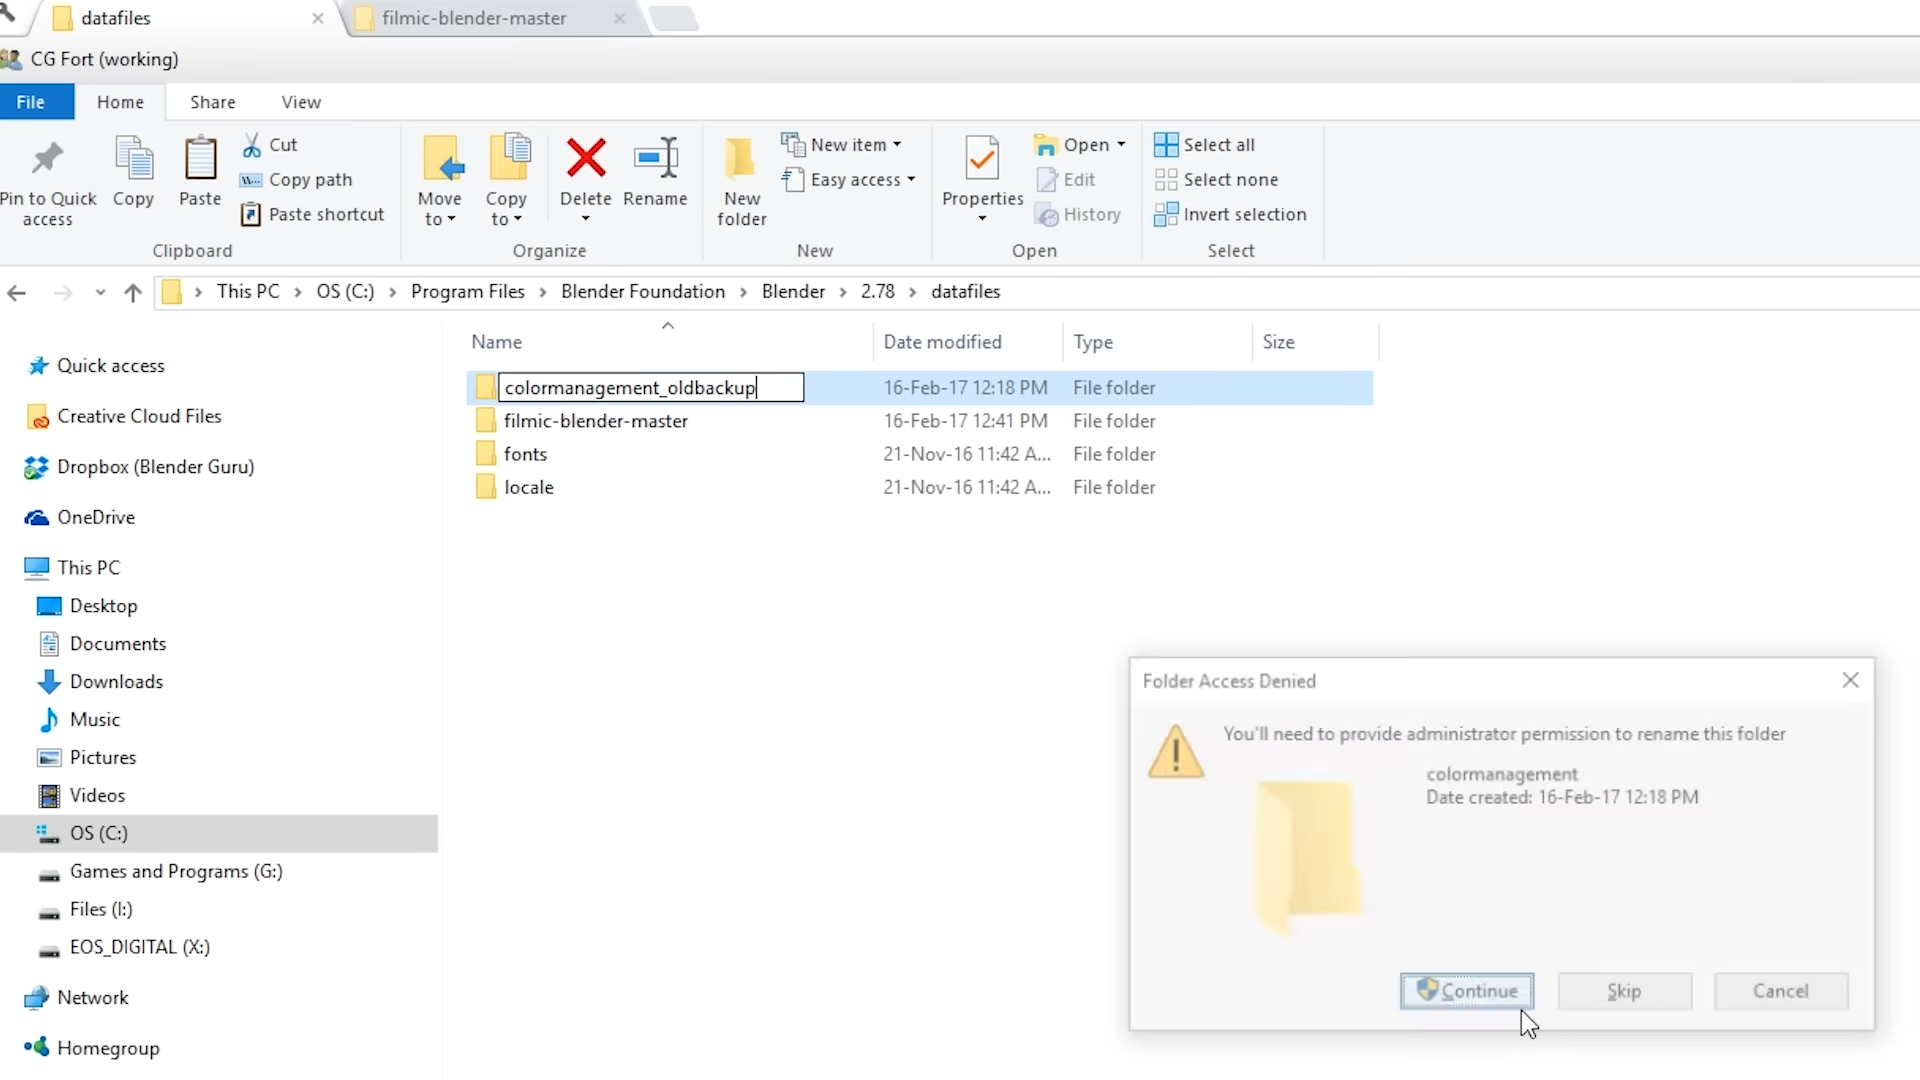
blender is installed and i'll show you where we're going to move that folder to so if you're on windows which stats tell
13:18
me that that's where the majority of my viewers are from if you're on windows you'll find blender
13:23
installed under the c drive program files blender foundation blender and
13:28
then the version of blender that you're using the latest one i've got 2.78 so double click that and
13:34
then underneath that click on data files and then here you'll see three folders
13:39
color management fonts locale okay this is the place that we're going to drag that folder okay
13:45
so i'm going to copy that hit ctrl c and then control v it over here and hit continue
13:51
okay so what i'm going to do so this this new folder here this is actually going to replace this folder so just so
13:57
that blender doesn't use this one but i've still got it if i in case i wanted to go back to it i'm just going to rename it by hitting f2 then underscore
14:05
alt backup and hit continue okay so that blender won't be able to see it but it's
14:11
there if we wanted to now with this one making making sure that it's this inside
14:16
right i'm going to rename that color management and click continue
14:22
okay so that's what you've done so again checking make sure data files inside column management you see this directly


14:28
underneath that folder okay so to check that it is installed properly go ahead
14:33
and open up blender all right so
14:39
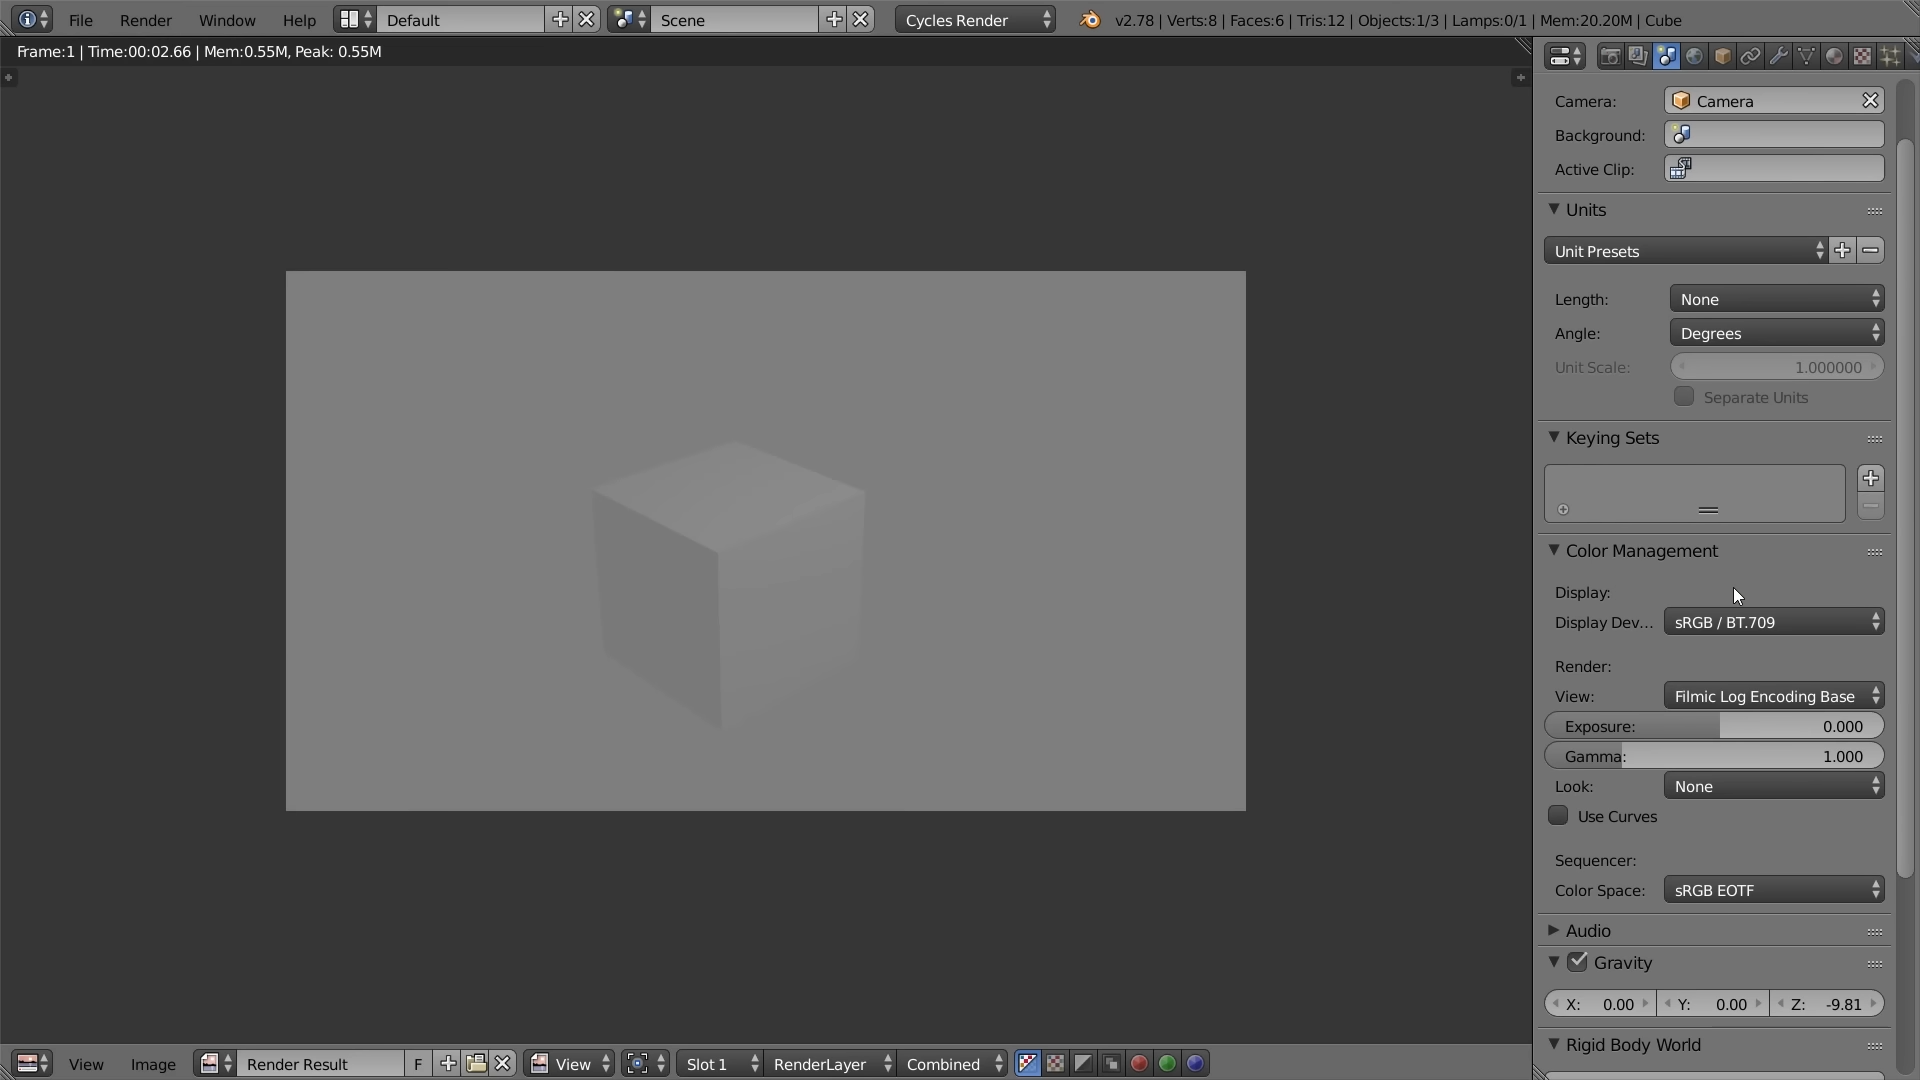
if you go to the color management section of blender which you'll find underneath the scene panel and then down
14:45
here underneath color management to check that it is installed properly if you see underneath render view you've
14:52
got one that says srgb eotf click that if you see these options here that means
14:58
it is installed correctly congratulations now if we were to give this a render right now just with these
15:04
uh without changing anything you would see that it looks i mean it's a basic scene we haven't got much here to compare it
15:10
to but it looks like a standard render and that's because by default it is actually still using the srdb color
15:17
transform so that's the default in case you wanted to go back to it that's what you would use but you would actually to use the filmic blender
15:24
color transform you're going to use filmic log encoding base okay which doesn't sound friendly or like that
15:30
would be the one but that is the one filmic login coding base and then it'll look really washed out so
15:36
then you can change your look to one of these and again if you just want something simple and easy to go with you would click base
15:44
contrast okay so that is the five second version of how to use it how to install it and to check that it's working so if
15:49
you just want to get started and just start using it that's basically the the values that you use okay now i'm going
15:55
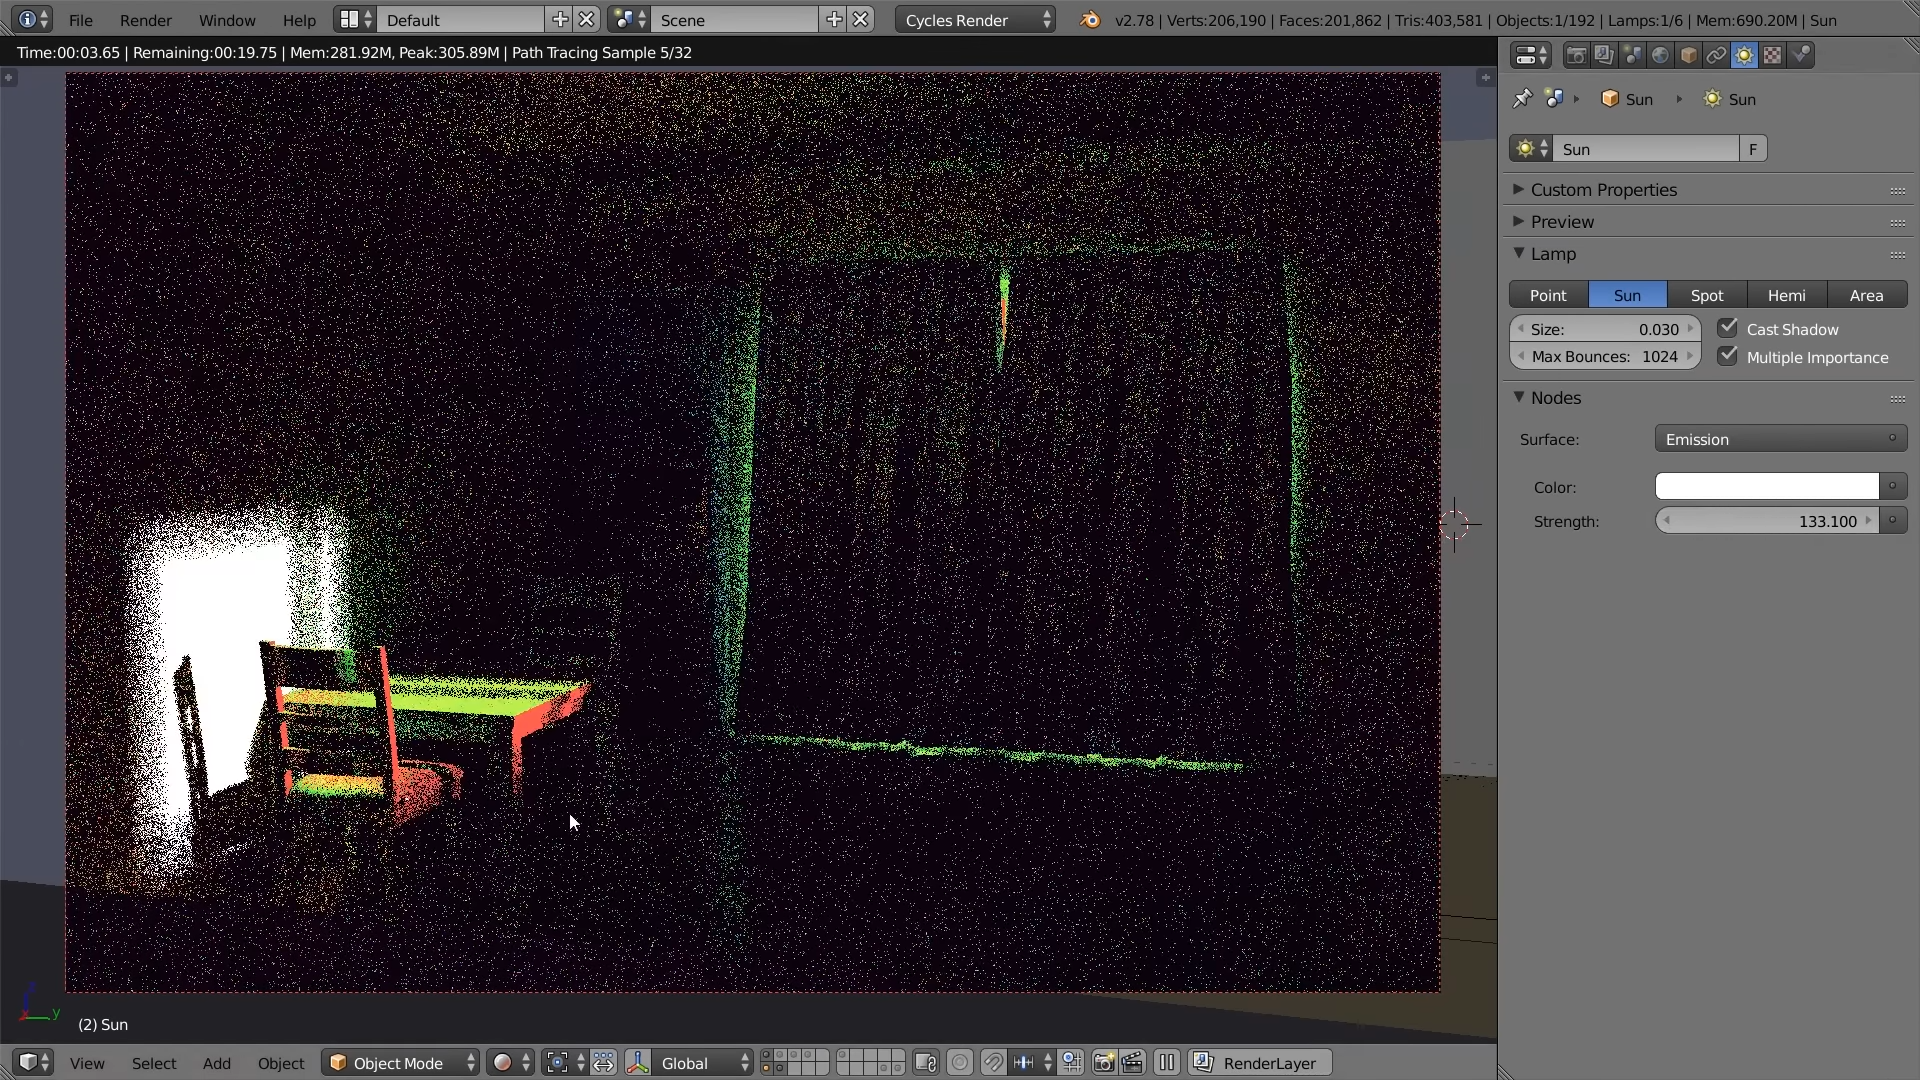
to go back to my uh example scene my interior and now remember that it was clipping
16:02
before okay and it still is because uh by default it is still using the srgb uh
16:09
transfer mode okay so watch this okay i'm gonna change it to filmic log encoding base and watch the wall the
16:17
table and the chairs ah all right now if if you look at this and
16:23
you go okay yeah you fixed that but you've also got a really gray washed out image okay now a lot of
16:30
people yeah they try filmic blender and they see this and they're like uh doesn't look good i'm out but actually what you're looking at is
16:36
is quite normal for a you know professional grade camera or you know some external renderers you're seeing
16:42
the raw file so it hasn't had a what's called a lut lookup table
16:48
applied to it yet to bring it back to uh its true value like how it should actually look so those are found
16:54
underneath the look section here so these are the looks there remember i said before base contrast is just an
17:01
easy one you can click if you click that this will give you a render that looks something similar to what you're used to
17:07
seeing so these are a range of different contrasts starting with very low all the way up to very high
17:15
and honestly it's it's personal preference um i find honestly nine times out of ten the base contrast looks great
17:21
so that's just the one that i use okay so yeah so you can see that there's no longer clipping going on in our our wall
17:28
or our chairs or our table but you might think okay yeah but the scene still looks pretty dark you haven't fixed that
17:35
problem that we mentioned before right well the reason it's still looking dark is as you might remember that there
17:40
wasn't enough bounce lighting coming back into the scene from that sun okay and the reason for that is that the sun
17:46
isn't bright enough so now that we're using this new filmic blender filmic log encoding base um
17:53
let's try increasing the sun value okay so watch this if as i turn this up
17:59
okay i'm just going to increase it to 50. just to show you we we still aren't losing information
18:05
we're still not clipping at 50 okay let's try a hundred
18:12
all right we're still not okay and like this is a crazy high value something
18:18
that you would never consider doing with the old uh srgb value mode um because this would
18:25
just completely blow out the scene this would just be you would never think of using a value like this um so it's it's
18:32
kind of like a like a paradox shift like once you switch to filmic blender it requires you to sort of reconsider how
18:38
you would traditionally light a scene and really crank the values beyond what you normally would because you i don't
18:45
know like it i noticed it myself when i started using it i started like you know just doing small adjustments but now i
18:51
you know i've used it for a little while i'm just using really big you know wild adjustments so when you first get into
18:57
it just get into the habit of like just trying higher values and speaking of
19:02
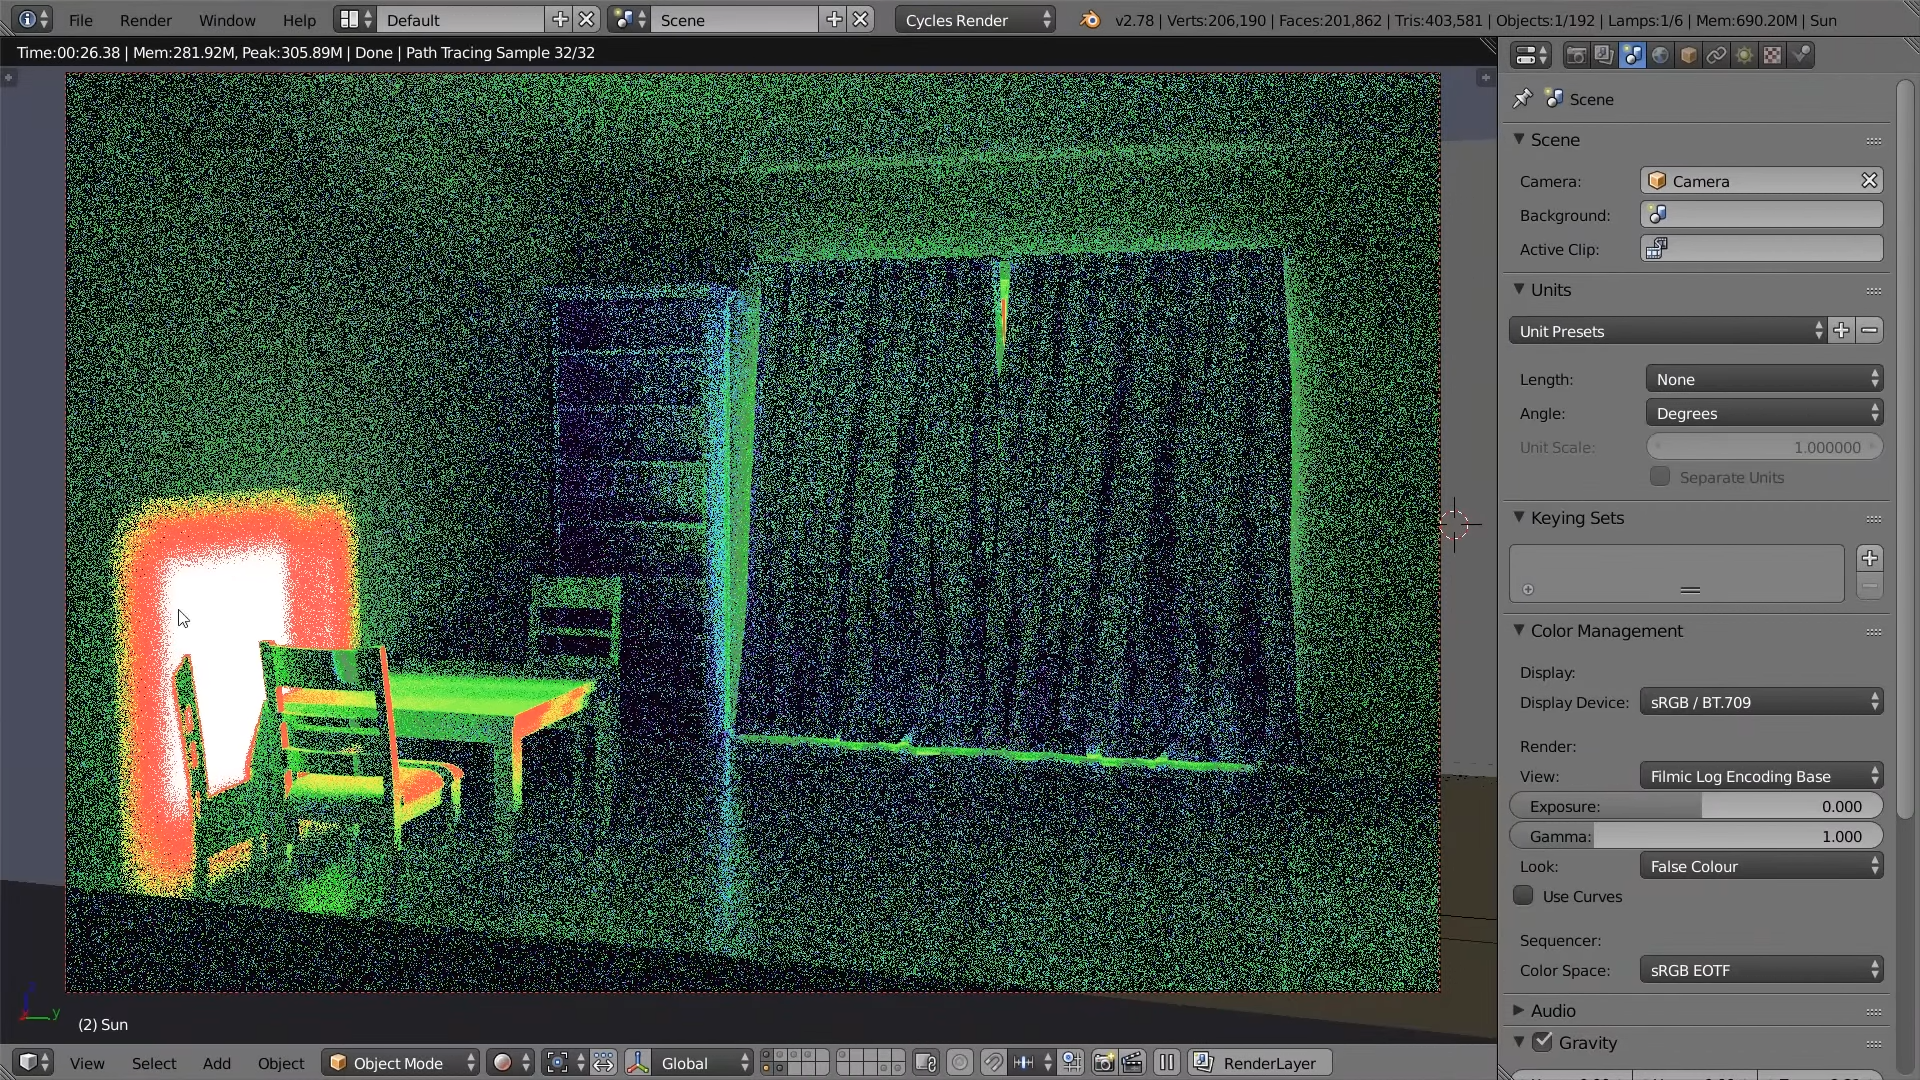
which there's actually something else underneath the look here which is really handy for playing with lighting and


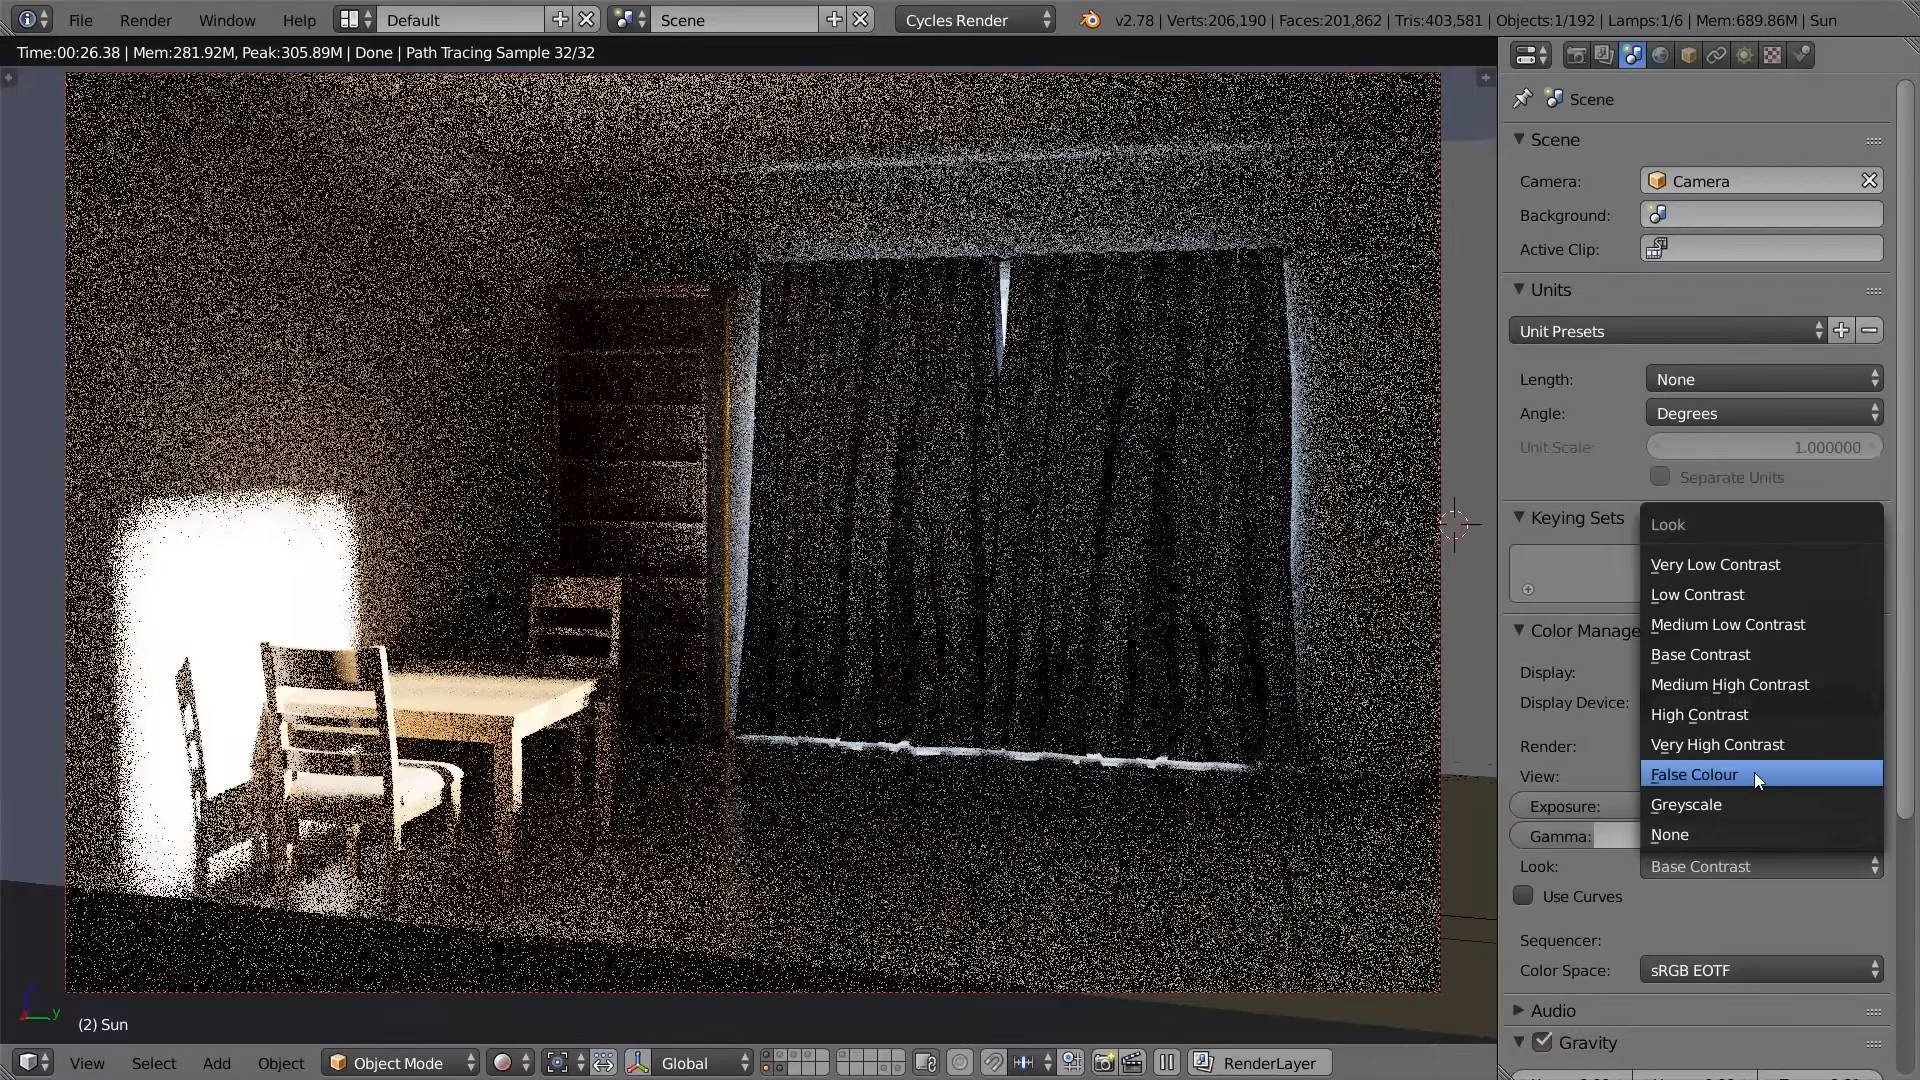
19:09
that's one here that says false color now when you click it you'll see these
19:14
crazy values and you'll be like oh okay i'm out i'm out but this isn't designed as a final
19:20
render this is designed to visualize the exposure ranges of your scene okay so
19:25
what you're actually seeing is kind of like a heat map of what's exposed what's overexposed what's not what's
19:31
underexposed so blue is really low exposure i think black is i guess
19:36
nothing anyway blue is very low exposure uh green is low to mid yellow is middle
19:43
exposure red is high exposure and then white is when it's actually clipping
19:48
okay so on our wall here we've got white now that's not important because it's you know it's a white wall it probably
19:54
should clip in this example right um but you can see that on the on the table and chairs there it it's still in
20:01
the red range so i'm actually still not clipping which means i actually know that i can increase my lighting now okay
20:07
i might just try dragging it up to like 130 because i know that was sort of the value i used for my final render
20:12
um and you can see it like i'm still not even real like there was a tiny little bit peeking through this this is
20:18
probably about as high as i'd go but this this mode this false color like
20:23
when i first heard of it i'm like nah that's not for me that's for those technical lighters but once i started
20:29
using it i was like oh wow this is really handy because normally in blender
20:34
you do a lot of guesswork like trying to guess what's exposed what's not but this just it does it all for you
20:40
like it's so handy even if i didn't have the filmic blender attached on top of it having this look
20:47
is just ah it's so handy so definitely like when you're lighting your scene you know basically this is this is my
20:53
workflow now i make sure i'm in filmic log and coding base for everything from now on and then i use false color to uh
21:00
to check the values and the cool thing is is that because it's a it's a look up table mode like it's not a compositing
21:06
effect or anything like that you don't need to re-render to see it you like you can render a final scene and then
21:11
afterwards change your bass contrast you know whatever go through this
21:16
and you can check your lighting in there and you can also see it in the render view mode

so you as you're like
21:22
interactively changing the lighting you'll see it reflect on everything so it's just super super handy um and
21:30
yeah just allows you to do so much so that's the example and this is the final render once i used it and you can
21:36
compare it with the original render and you can see without a doubt that uh that this one is is just
21:43
supremely better in every way it's amazing how something
21:49
so seemingly unimportant as dynamic range can have this carry-on effect to the
21:55
entire scene and just i mean it looks like it was rendered with something else you know like it's so
22:01
so big um it's just incredible i love it i just love it so much
22:07
now if you're looking at these two images here and you're thinking hmm is it just me or is the one on the right a
22:14
little bit more desaturated than the one on the left well you would be correct so this is
22:20
something that filmic blender does that makes it even cooler and that's accurate
22:26
color desaturation you see on film as parts of the image
22:31
become more exposed the colors will naturally start to desaturate

22:36
so this happens due to cross talk between the film layers and it's something that's unique to film
22:42
and while you could call this a technical limitation it actually looks more pleasing to the eye and actually
22:49
more natural to what you think you should be seeing to the point that some dslr companies
22:54
today even have software installed on their camera to imitate this effect for the digital format to show you an
23:01
example of this i've got a very basic scene here i've got three planes and i've got a sun lamp shining down on it
23:07
and this is using the srgb mode okay so each of these planes are a different
23:12
color we got red green and purple and what i'm going to do now is just increase this sun lamp to show you
23:19
why the srgb is is not working the way you would hope that it would okay so as
23:25
i increase the strength here watch how for some really weird reason
23:30
the colors have now changed okay we've we've gone from red green and purple to
23:35
yellow aqua and pink but not only that you can see that as the intensity of the sunlight the light
23:42
hitting it grows these colors never fade out now you can imagine if if somebody was wearing a red shirt right and they
23:49
happen to step into an extremely bright light like a supernova or something at
23:54
some point you wouldn't be able to see it right but with srgb you will even
24:00
though there's extreme amounts of overexposure colors will show through almost like they're transparent like
24:05
this neon effect and it's just ugly in fact you
24:10
probably have actually already experienced this yourself um if you've ever tried to use the emission shader
24:16
right and then tried to make it look like i don't know you're making a spaceship and say this was the tailpipe and you wanted to make it look like
24:21
there's a jet blast going out the back of it so you increase the emission and what happens um yeah instead of it
24:29
fading out to white which is what your eye would expect to see it just becomes this this more saturated color and it's
24:36
ugly i remember encountering this when i was working on my sci-fi drone and i just had to fix it in photoshop but this
24:43
is because srgb is it's mangling the color data i can't understand it other than to tell you that
24:50
but so now i'll what i'll do is i'll switch to let me put this back to diffuse what i'll do is i'll switch to
24:56
the filmic blender to show you that okay so look at that okay
25:01
i'll put this back to its previous value of one now watch as we increase this the hue of these colors isn't changing
25:09
and as this increases as it goes up and up the colors begin to fade away which
25:14
is natural it's what your eyes should uh is expecting to see in this situation
25:19
so this is something it's subtle and you'll you'll notice it like you'll see in your render and go like oh nice like
25:26
it just feels nice it's uh yeah you like now that now that you've seen
25:31
it you can't unsee it you'll if you go back to the sigb you'll be like uh these colors just feel ugly right uh well now

25:38
you know the reason why um so to finish i'll end with a question that a lot of people have and that's
25:46
where did all those creative looks go from the color management section if you've ever used them before you might
25:52
be missing them well this may surprise you to hear this but the looks that come with blender shouldn't really ever have
25:59
been used now the reason for this is that they're used for transforming color data but
26:06
transformations are only valid for the specific range of color information captured by that camera
26:13
so basically applying it to your render was the equivalent of slapping an instagram filter on a professional photo
26:21
and while it's possible to get a nice result from that it's much more likely that you were just gonna mangle your
26:27
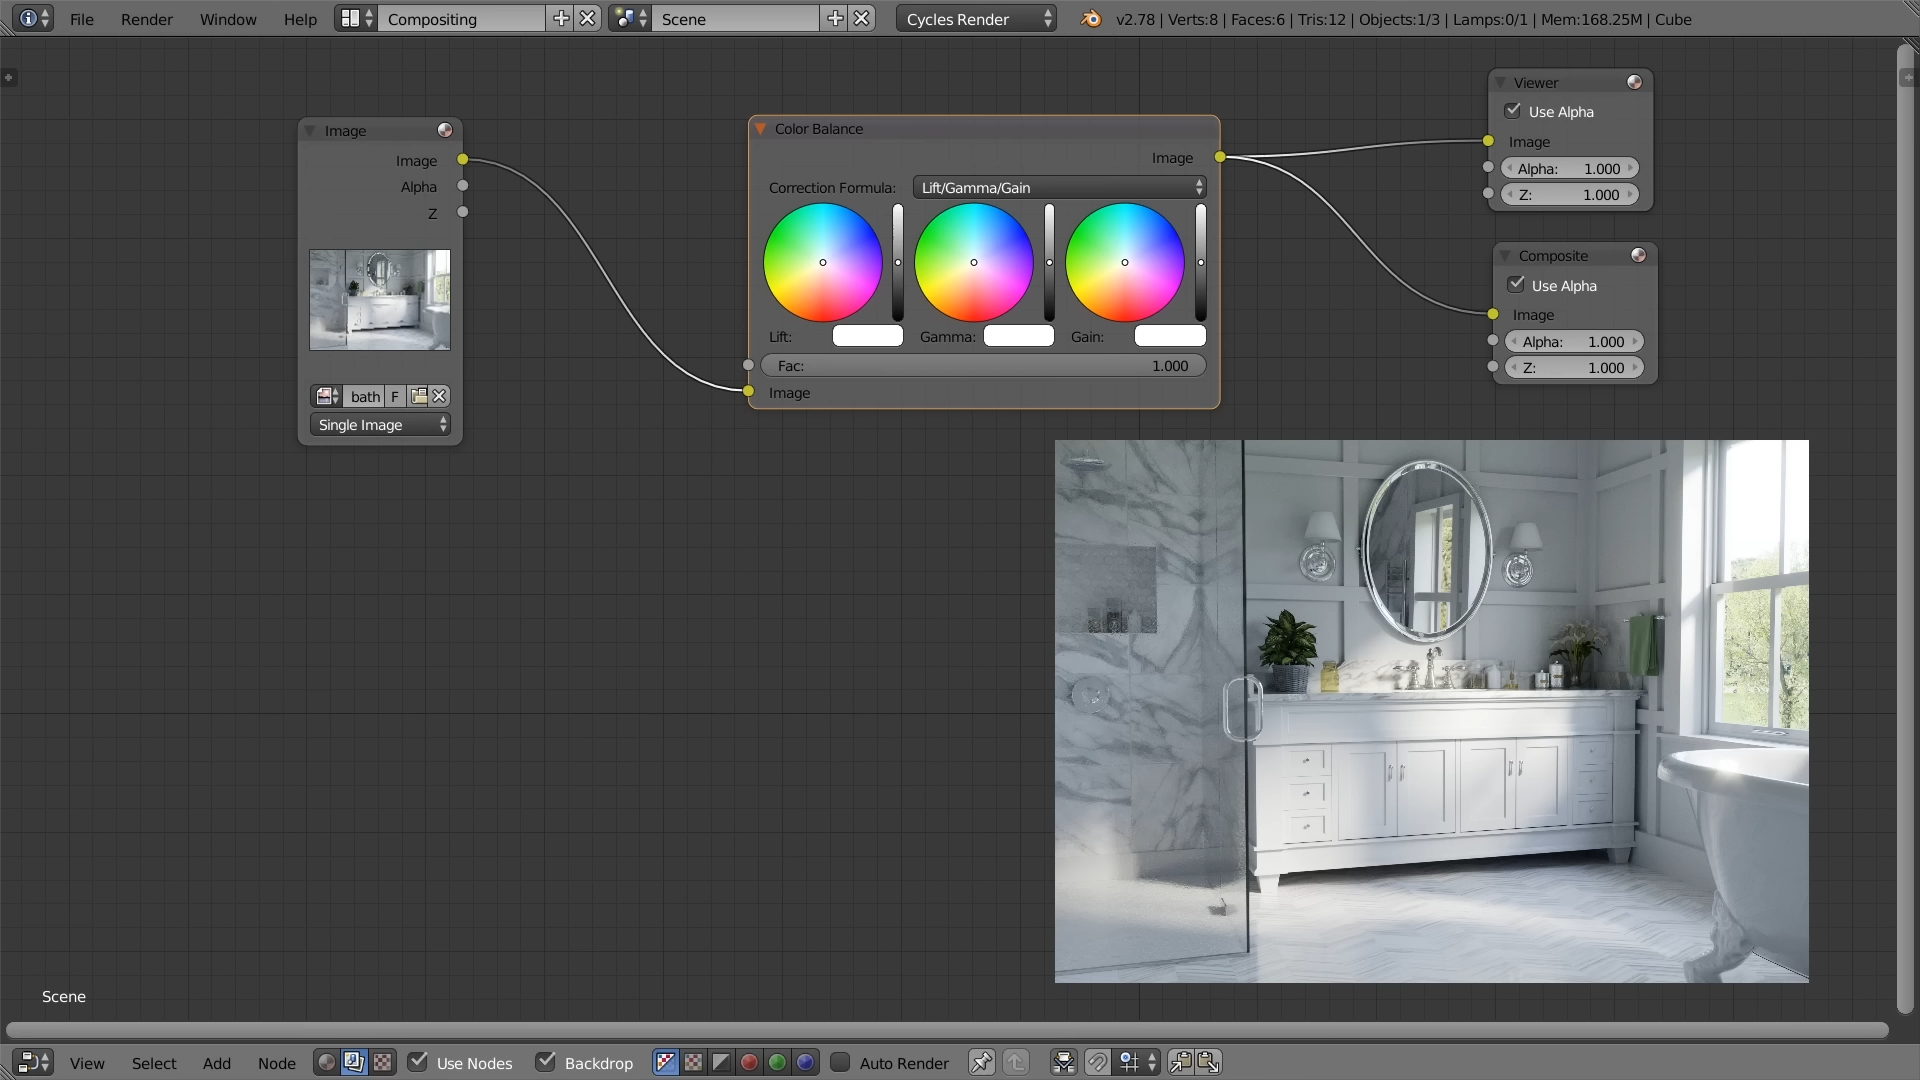
data in ways that you can't see so instead i'd encourage you all to do
26:33
your color grading in the compositor with the color balance node
26:38
which is a nice segue to my next point which is that some of the compositor nodes are incorrect too
26:46
so just like how the sigb is incorrect despite it being included in blender for
26:51
so many years many of the nodes that come with blender are also incorrect and
26:56
by incorrect i just mean they're meant for display referred workflows not the
27:01
scene referred workflow of blender there's some technical stuff you could look up if you wanted to but that's the
27:07
basic uh explanation so to start with um with the color balance node where you
27:12
should be doing your color grading this correction formula lift gamma gain
27:18
shouldn't be used you should be using the asc cdl now don't worry if you don't
27:23
know this i didn't know this either uh but basically this has been like this isn't something that the filmic blender
27:29
changes and makes this incorrect these have been incorrect forever in blacktown right i wrote at least since it's been
27:35
using the uh scene referred workflow so you should be using this which will do the exact same thing but it will give
27:41
you basically it will hold on to your colors the way they should be held on to and
27:46
they behave just like you would normally expect except that this middle one here is the opposite of what you'd expect so you know if you wanted to adjust your
27:52
mid tones you know um you wanted to make it yellow you should be pushing it towards blue um vice versa i'm sure
28:00
there's a technical reason for that but that's basically it um so you know you can do proper color grading in this if
28:05
you want to make it look more saturated you can do it like that um but yeah and this by the way is
28:11
basically what is going on with the filmic blender when you change the looks like basic contrast low level contrast
28:16
it's basically loading in this kind of thing with this with different amounts of this with no color obviously
28:23
but there you go um now there are also a bunch of legacy nodes um or legacy modes that are
28:30
included in blender that shouldn't be used as well


so for example in the
28:36
color mix node this one right here you know these these different blend types here
28:42
well there are a bunch of them that shouldn't be used as well now i know this will people be like what
28:48
but multiply um screen divide dark light and overlay these shouldn't
28:55
be used now the reason for this is that they are based off the uh display referred workflow um
29:03
basically that they come from the adobe blend mode um i don't know what this is called but this is basically
29:08
uh this document basically outlines these ones here so everything in this document the multiply screen overlay
29:15
darken light and color dodge color burn hard light soft light difference and exclusion they're based off the display
29:21
referred workflow so blender is using a scene referred workflow so it is mangling the data again now if you think
29:27
if you're hearing this you think like i haven't noticed any difference you know i use them all the time i hadn't either as well okay i mean i've
29:34
just been in close email contact with troy sabotka who's an industry professional who understands color
29:40
better than me or anybody in the blender um community at least that i've seen um and he's he's
29:46
basically been telling me this and almost everything you've been hearing in this video comes from him so um yeah i'm
29:52
assuming that he's correct um but you know yeah if you're wondering why this stuff is included again because that's always
29:58
been my question it's it's like this stuff hasn't been itemized and addressed yet like because color hasn't really
30:04
been a priority for blend or at least i suppose really talked about in this sort of uh regard so there's stuff like this
30:11
the multiplier the screen that stuff that was from the display referred workflow we're now in scene referred
30:16
it's all very confusing but basically i'm hoping that this video can help to um to bring this sort of thing to light so we can at least discuss it and then
30:23
maybe in the future this stuff can be removed or changed so that it's uh it works properly basically
30:28
um but there you go i sincerely hope that people will start using the filmic
30:34
blender color management system so please help spread the word by sharing this video with any blender artist that
30:40
you know and of course clicking like so that others can find it more easily and also if you make a render using filmic
30:47
blender if you can use the hashtag filmic underscore blender when you post your image online others will be able to
30:53
see it more easily and yeah and also if you're on twitter please give troy sibotka a shout out and a
31:00
thank you he's at troy underscore s uh he not only made the filmic blender
31:05
uh obviously but also gave up several hours of his time to personally answer my questions via email and also reviewed
31:13
the script for this tutorial for accuracy so anyways thank you all for watching and i will see you next time bye

'sw > blender' 카테고리의 다른 글
| lattice deform (0) | 2024.03.14 |
|---|---|
| blender010_doughnut Random Colored Sprinkles (0) | 2022.12.29 |
| blender ; rendering resolution (0) | 2022.12.23 |
| blender review_001-009 mint doughnut (1) | 2022.12.23 |
| blender q&a; sRGB vs Linear (1) | 2022.12.22 |


