ggg' day!
궁금해져버려서 아이소메트릭 시작.

1. a; select all
2.x; delete
3. shift a; plane under the mesh
4. add solidify modifier.
> increase thickness

6. add bevel modifier; to lessen the sharpness
>increase amount
7. duplicate the object; shift d >
enter edit mode; tab
select all by a >
scale down; with s
a; select all
and scale it
s+x/y/z ; this time s+x to restrict the scaling on x axis.
exit edit mode > move this up with g, and z.
g+x/y/z; to grab and move

8. lower down the thickness on midifier,
adjust the beveling
press g+x> to move it on x axis
and bevel it by beveling > edges> amount >0.005m

9. instead of duplicating, we can add an array on the modifier.


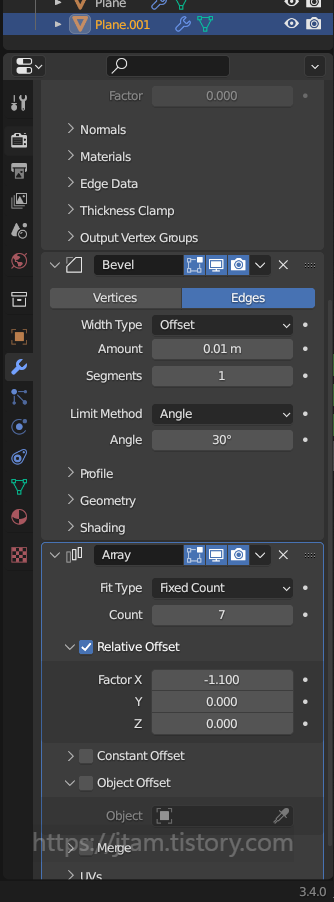
10. count for the number and factor x for the gab
221215> 복습 중 알게 된 것,
타일 간의 갭은 array > factor x 에서 한 번 더 준다.
11. now let's put a wall, shift a > add a cube,
enter edit mode by tab
enter face selection mode by pressing; 3
select all faces except two walls,
holding the shift key and do click for the multiple-face selection.
select all; a
and move it up.

12. on the wall put solidify modifier, and give thickness.


13. add thickness by solidifying, but you should click
'even thickness' to even the increase.
14. to edit the wall, we should apply all the modifier,
so control a
221215> 복습 중 알게 된 것,
modifier apply 안할 경우, 벽을 면으로 만 인식해서,
뒤에 있는 부분 까지 입체적으로 룹등 추가 효과가 들어가질 않음.


15. for loop cut ; ctrl r > right click to cancel the movement
> control b to bevel.
이걸 연이어서 해야 함.
221215> 복습 중 알게 된 것,
루프로 쪼개면 선으로 쪼개짐, 선으로 면을 만드는건 extrude라고 생각했는데,
bevel 이었음.. 그리고 여기서 사용한 bevel;ctrl b은 modifer에서 추가한 bevel과는 다른 개념이고,
따로 modifer에 뜨지도 않음.

16. select top and the buttom faces by entering 3,
alt-click the corner faces for the loop selection
and alt shift-click for the multiple loop selection

Press alt + e; to extrude > extrude faces along normals
>add bevel modifier
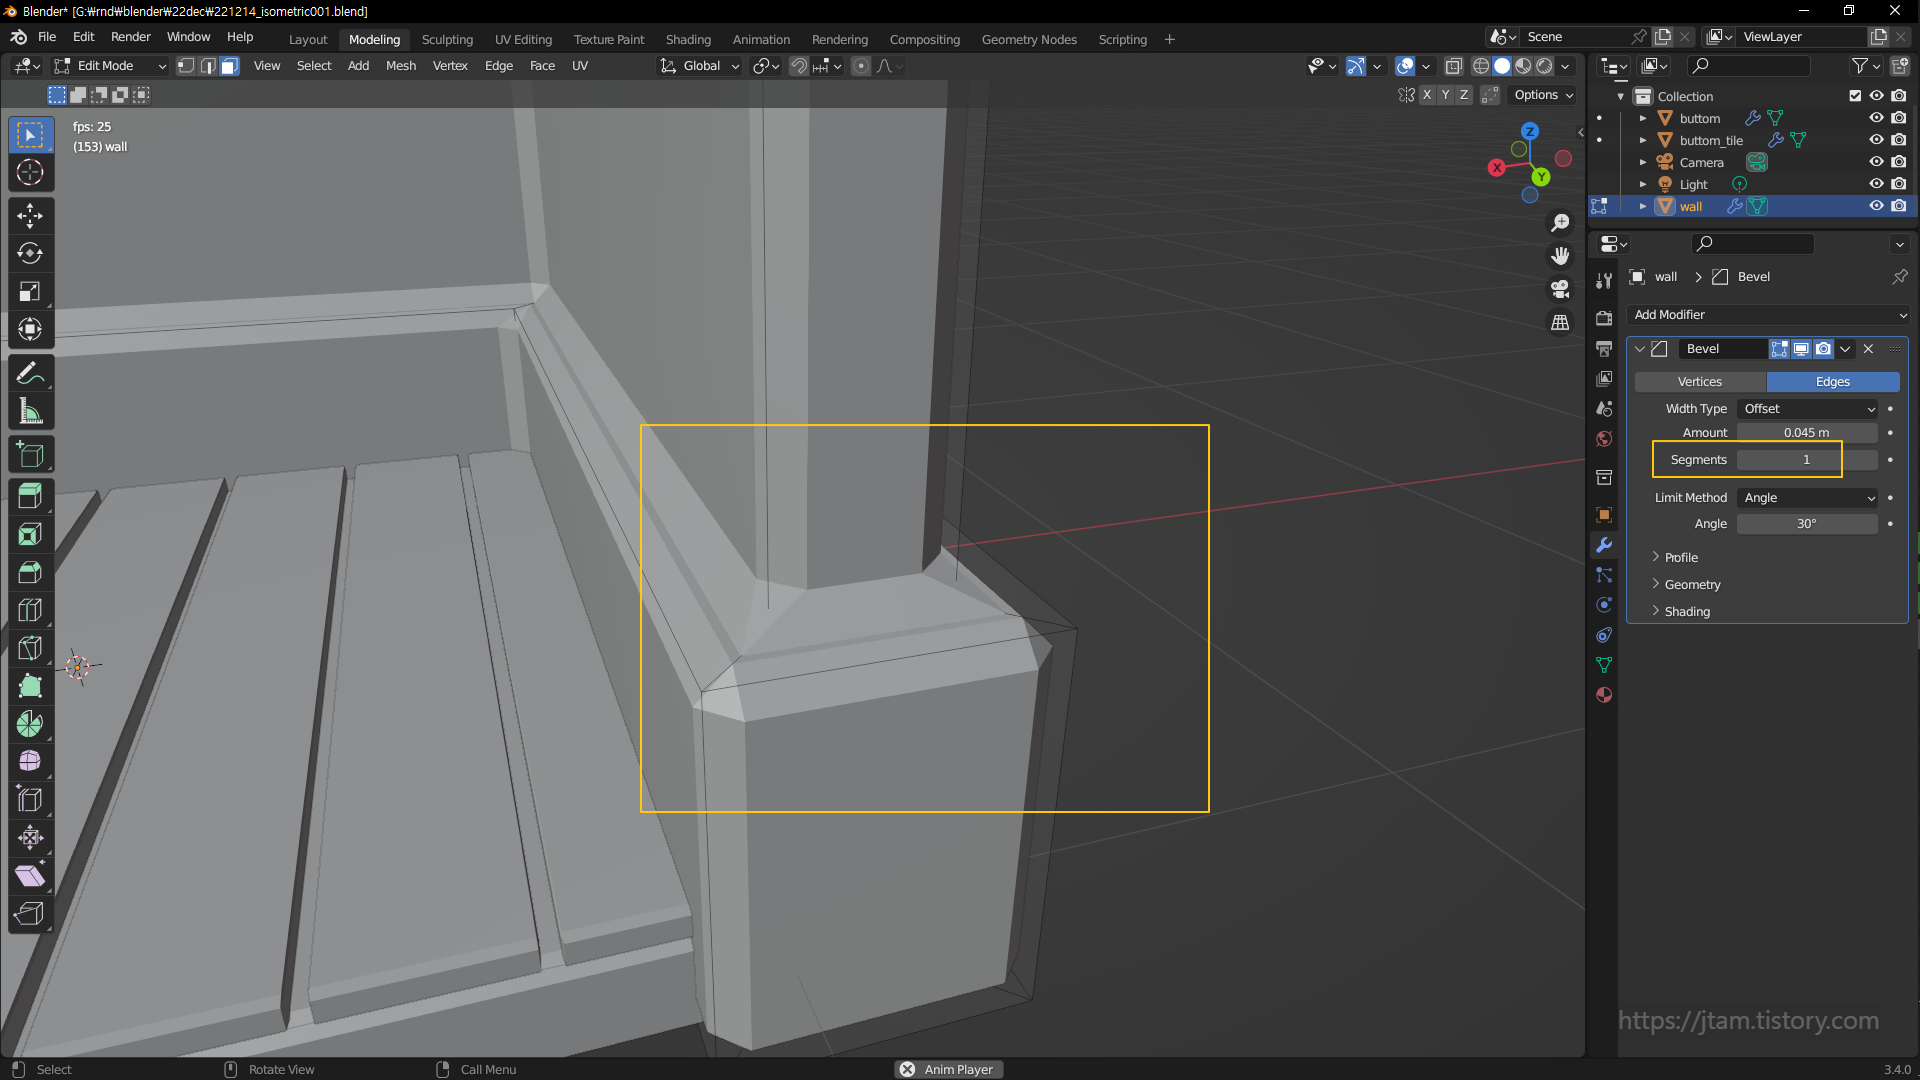

also, add segment

result

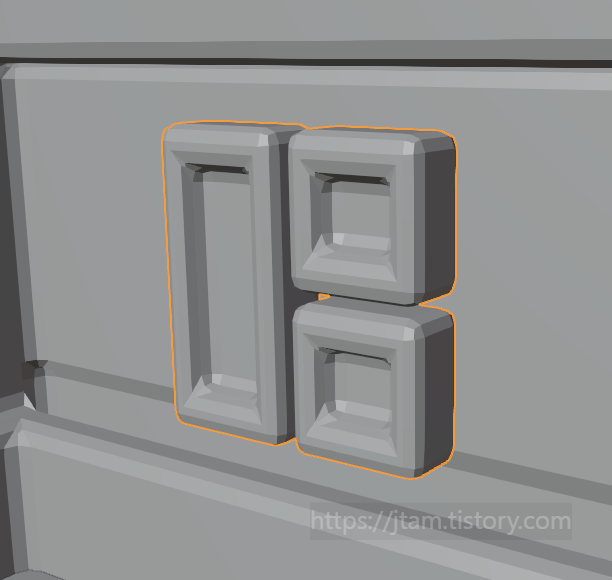
17. click one wall and shift d; to duplicate >
right click to cancel the movement
> p > select selection > seperate selection
select new object in obj mode and return to edit mode

18. x to scale it down
Press e to extrude
and I to inset.
use i (inset) and e( extrude) to make the window.

19. turn to the left to see the window's front.

20. x-ray view with alt+z,
x-ray view will let you select the vertices at the back as well.
a ; to select all > move left and duplicate .

21. select the bottom vertices and move up.
duplicate to put it under and resize each to array.
1; to select vertices
2; to select line
3; to select faces

22. exit xray view ; alt z
23. similar way make shelf on the other side of the wall

this was today's progress.
I'll keep it up hopefully in the near future..


review version
'sw > blender' 카테고리의 다른 글
| blender006_rendering doughnut! (1) | 2022.12.16 |
|---|---|
| blender error001_ grey space zoom problem & solution (0) | 2022.12.16 |
| blender005_ sculpting (0) | 2022.12.14 |
| blender005_ sculpting (0) | 2022.12.14 |
| blender004_review (0) | 2022.12.13 |


